
User's guide to Roundcube webmail for viewing email accounts from the browser
Hosting Solutions provides a simple and complete web tool - Roundcube webmail - to manage and access your email account using a web browser (e.g. Firefox, Chrome, etc). The webmail can be used from the browser and from any device (PC, tablet, smatphone) thanks to the fully responsive interface.
Webmail can be accessed using the third-level domain 'webmail' on your email domain, in the format https://webmail.domainname.extension and a login mask in which you will have to enter your login credentials:
- email account user in the format username@domainname.extension;
- password, as set by the control panel when the account was created;
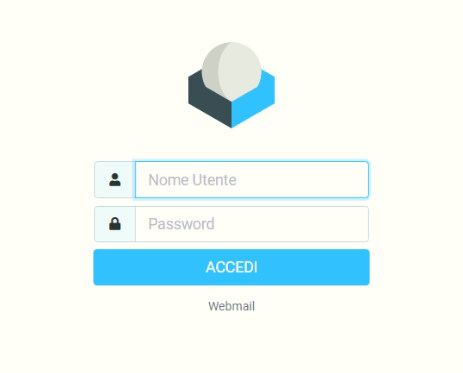
It is also possible to access the webmail from the address webmail.hostingsolutions.it and is available for all e-mail services.
Below are the two sections of the guide:
- User's guide, for information on using the main features of webmail;
- What to do for..., to set specific preferences (e.g. type of editor, type of displays, date format, etc.).
User guide
Once logged in, the webmail opens up the email viewing function (Email button) which shows four columns
In the first column on the left (always present) are the buttons for the main functions, which are as follows:
- Nuovo Messaggio (New Message), for writing a new email message;
- Email, to check your account;
- Contatti (Contacts), to view and manage the address book;
- Impostazioni (Settings), to manage user preferences, folders, filters and spam;
- Modalità Scura (Dark Mode), to change the graphical presentation of the interface;
- Informazioni (Information), to see the product information and version;
- Esci (Exit), to disconnect from the interface and therefore from the consultation.
Here is some information on basic functions, such as checking your inbox, composing a message, managing your address book and some useful settings.
Email button (default)
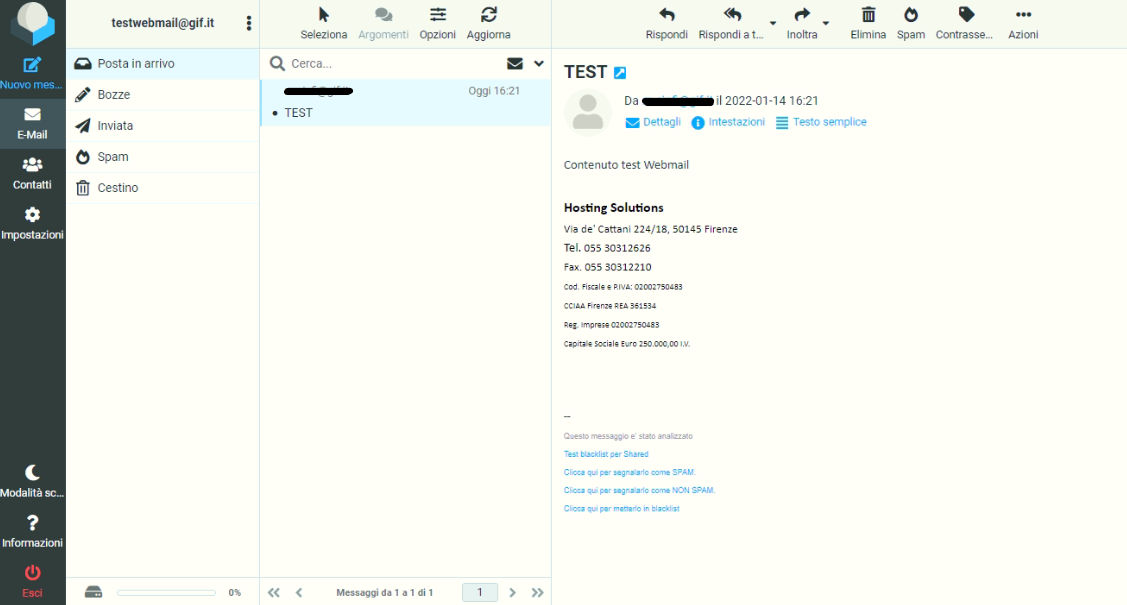
This is the main functionality of the webmail, which allows you to check the messages in the account; it automatically goes to the Posta in arrivo (Inbox) folder to show the messages received.
The second column lists all folders in the account, for example Posta in arrivo (Inbox), Bozze (Draft), Inviata (Sent), Spam, Cestino (Trash). By clicking on one of the folders, the third column of the interface will show the emails contained in it.
Lastly, by clicking on one of the messages in the selected folder, you will be able to read its contents in the fourth column on the right, where all the action buttons available on a message, such as Rispondi (Reply), Inoltra (Forward), Elimina (Delete), Spam, etc.
Nuovo Messaggio button (New Message)
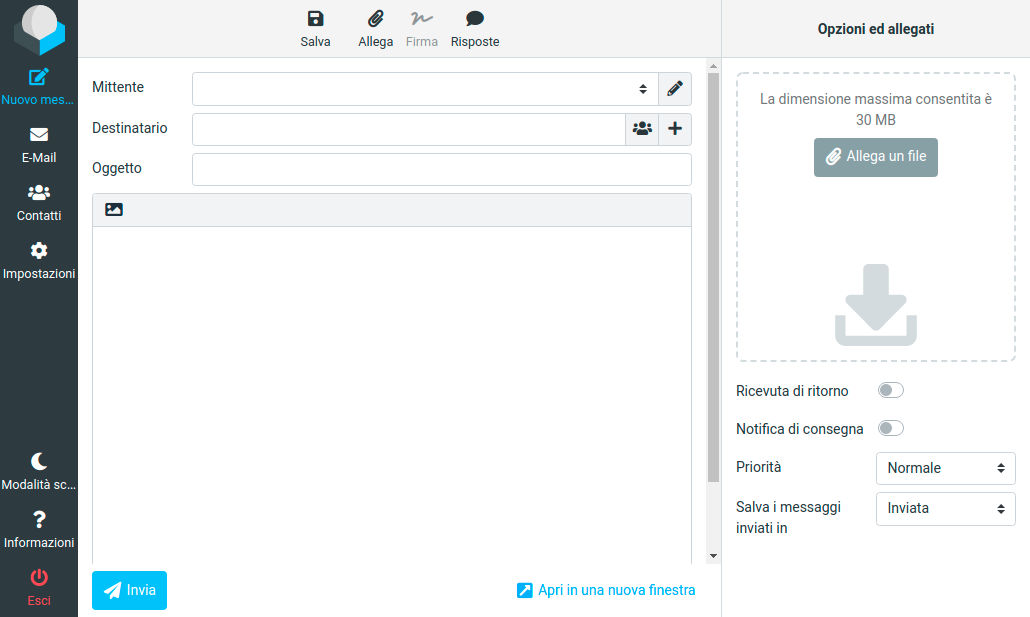
It allows you to compose a new email message.
When you click on this button, the second column will show the fields necessary for writing the message which are Mittente (Sender), Destinatario (Recipient), Oggetto (Subject) and an area for writing the content of the message. Underneath it all is the Invia (Send) button.
In the column on the right, you can set some options and/or insert one or more attachments, which must obviously be done before sending the message
Contatti button (Contacts)
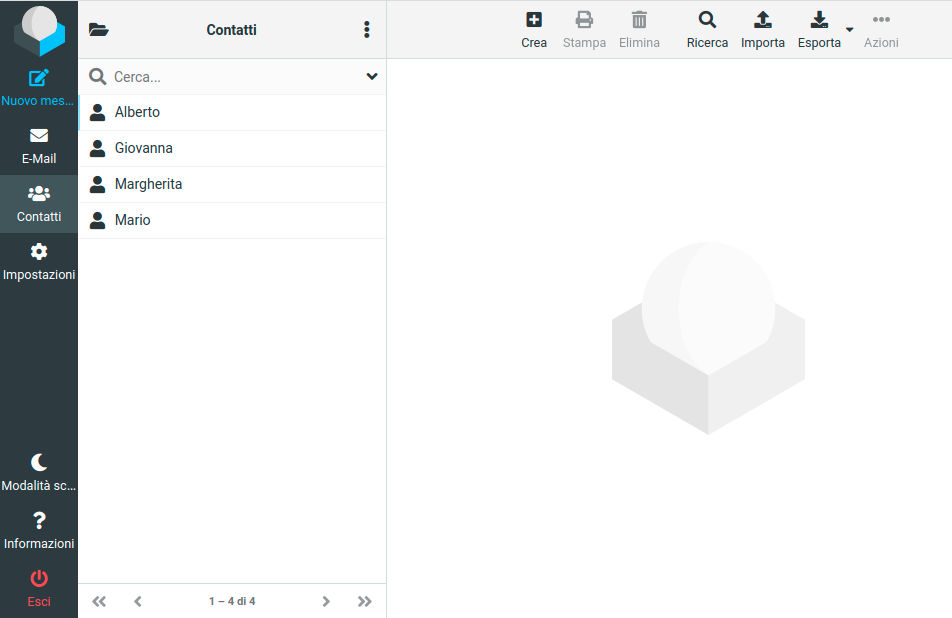
It allows you to access the address book and manage all saved contacts.
When you click on the Contacts button, the second column will show the list of saved contactsto view and edit the contact data in the third column on the right. In this column there are other buttons (top bar) for possible actions on the contact, such as Stampa (Print), Elimina (Delete), in addition to the general actions on all contacts such as Crea (Create), Ricerca (Search), Importa (Import), Esporta (Export).
Impostazioni button (Settings)
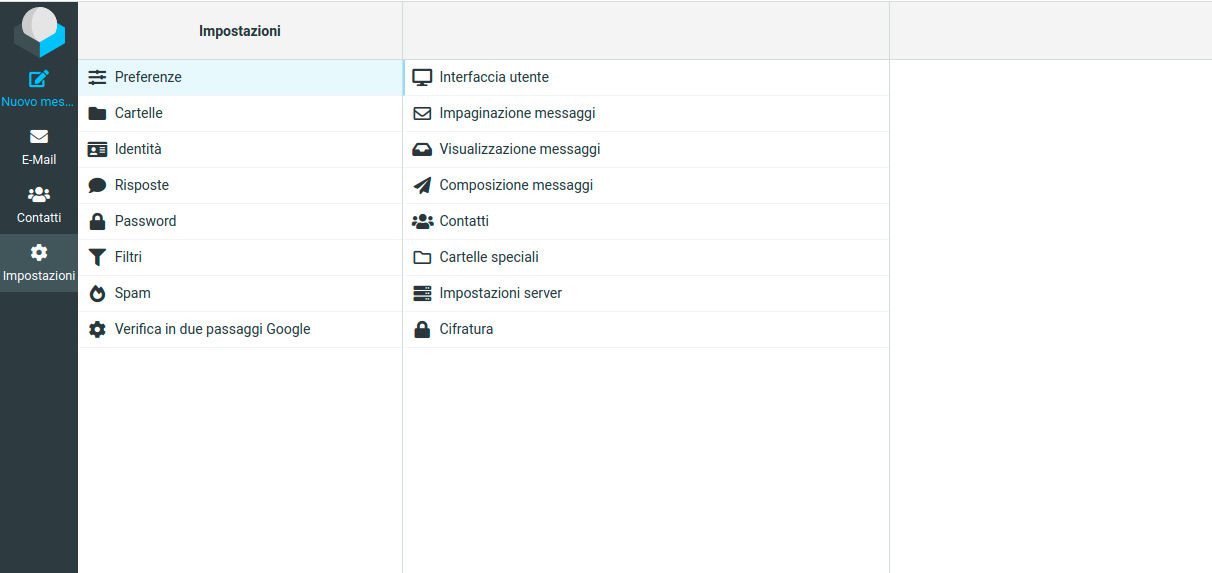
It allows you to customise the settings of the interface and its functions.
When the Settings button is clicked, the second column will show a list of all the settings that can be customised which are :
- Preferenze (Preferences), to customize the interface, the display and composition of messages, the display of contacts, the names of special folders (sent, drafts, spam, trash, etc.);
- Cartelle (Folders), to manage and display all the folders in the account;
- Identità (Identity), to manage the visible data of the owner of the account, including the signature;
- Risposte (Replies), to manage automatic replies;
- Password, to change the password of the account credentials;
- Filtri (Filters), to perform actions on received email messages when the rules specified in the filter are met;
- Spam, to customize spam management (score, tag to change the subject of the spam message), to set rules on specific addresses;
- Google 2-step verification
What to do to ...
Let's see what and how to set specific preferences, such as:
- display the list of messages by rows instead of columns
- change the date format of the message
- change the message editor from plain text to HTML
- activate 2-factor authentication with Google Authenticator
Display the list of messages by rows instead of columns
To get this type of display, you need to change the graphic theme of the interface. Below are the necessary steps:
- - Go to the account settings (Impostazioni button);
- Click ok Preferenze (Preferences) in the second column from the left;
- Click Interfaccia utente (User Interface) in the third column from the left;
- Click the Larry theme in the Tema interfaccia (Interface theme) section in the fourth column from the left
- Click the Salva (Save) button at the bottom.
After this operation, the graphical interface will have changed and will look like the following image:
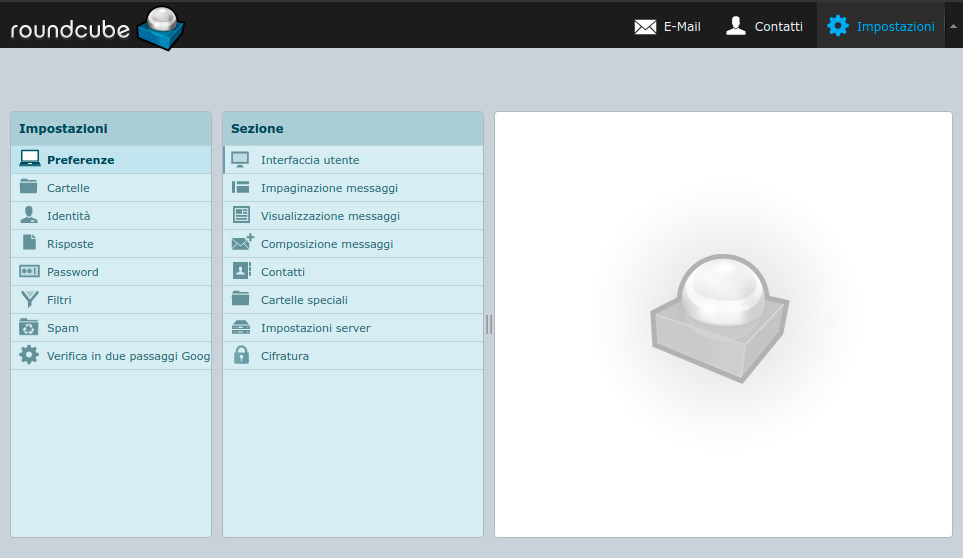
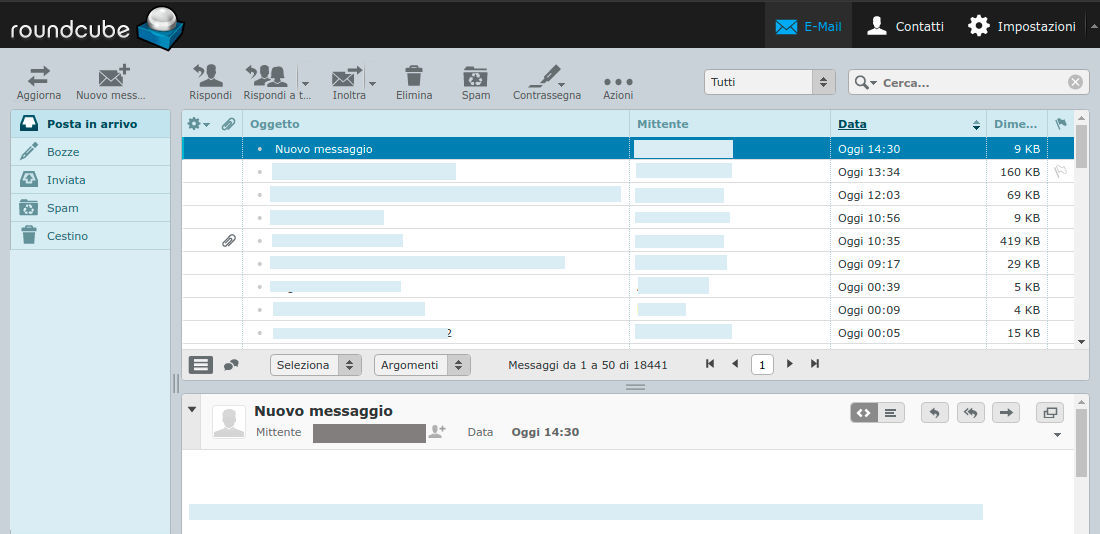
Then click on the Email button that now appears on a horizontal bar at the top right of the page; the page for viewing messages will appear like this:
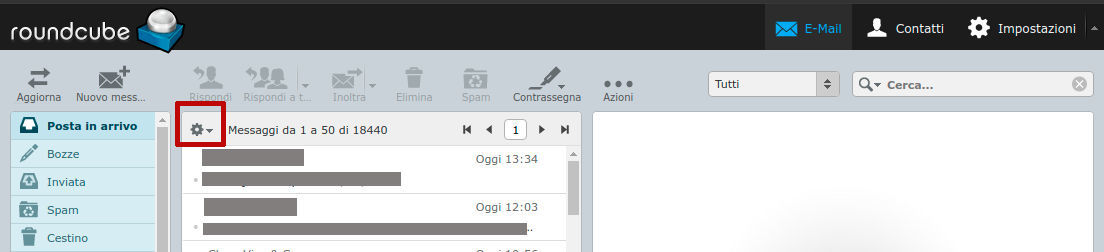
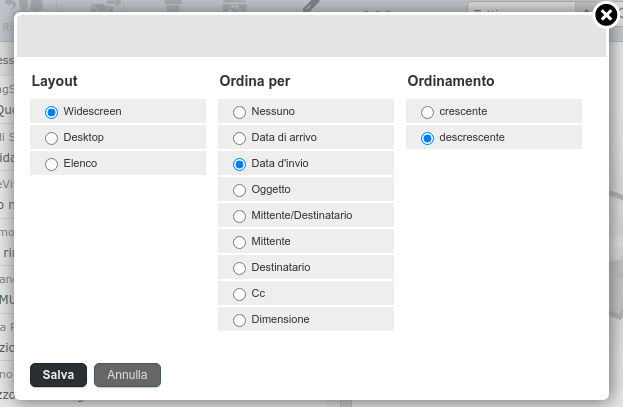
Click on the gear icon, in the top left-hand corner of the second column (see red box in the image above). A small window with three columns (Layout, Ordina per/Sort by, Ordinamento/Order) will appear in the foreground: click next to the Desktop entry in the Layout colums and then click on the Save button.
DFrom now on, the webmail will display messages and their content in a horizontal rather than vertical arrangement.
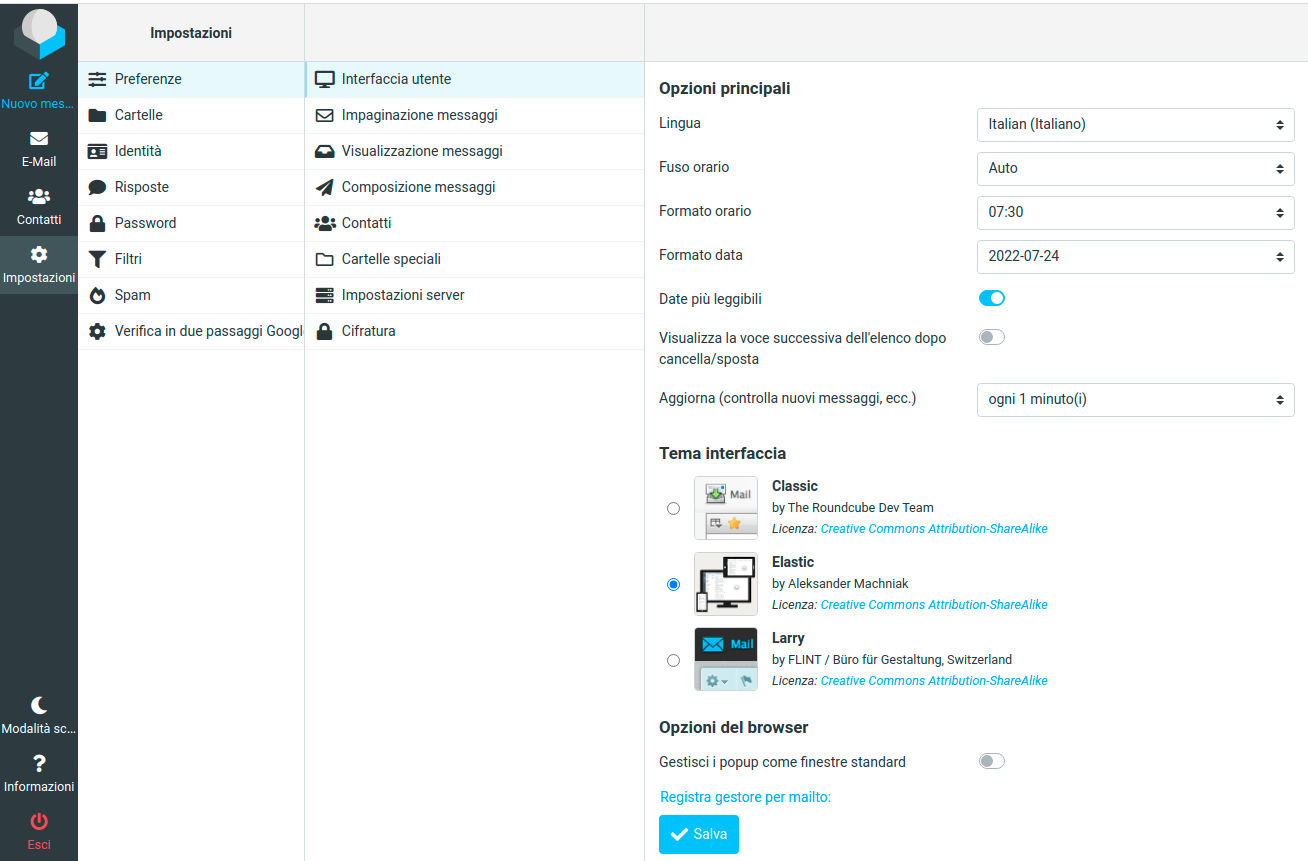
Change the date format of the message
PTo change the date format of the message, for example to switch from aaaa/mm/gg to gg/mm/aaaa (Italian format), perform the following actions:
- Go to the account settings (Impostazioni button);
- Click on Preferenze in the Settings column;
- Click on User Interface in the next column;
- In the Opzioni principali (Main options) area, in the Formato data (Date format) field, select the desired format;
- Click the Salva button to make the setting active.

From now on, the webmail will display the date in the chosen format.
Change the message editor from plain text to HTML (or vice versa)
To change the editor for writing an email, for example to switch from the text-only editor to the HTML editor, perform the following actions:
- temporary modification (while writing a message)
- Go to message composition (Nuovo Messaggio/New Message button on the main bar);
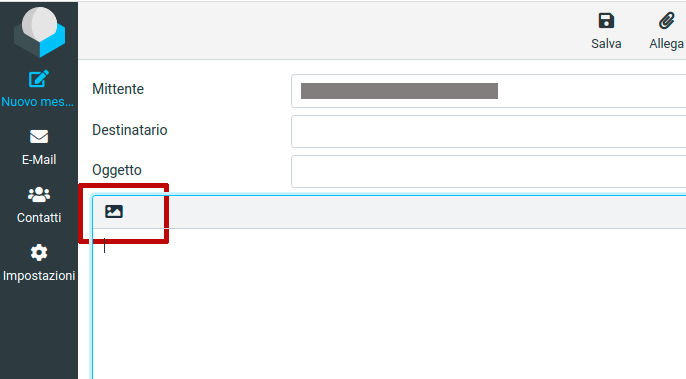
- Click on the icon at the top left of the text entry area;
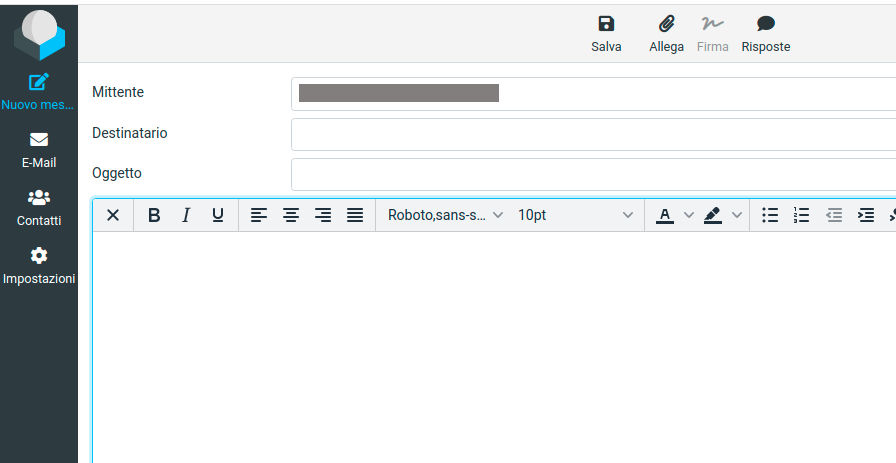
- The plain text editor will then be replaced by the HTML editor only for the message being written and will allow you to enter the formatted text
- permanent modification from the Settings section
- Go to the account settings (Impostazioni button on the main bar);
- Click on Preferences in the Settings column;
- Click on Composizione messaggi (Compose messages) in the next column;
- nell'area Opzioni principali(Main options) area, in the Scrivi i messaggi in HTML Write HTML messages) field, select sempre(always);
- Click the Save button to make the setting active.
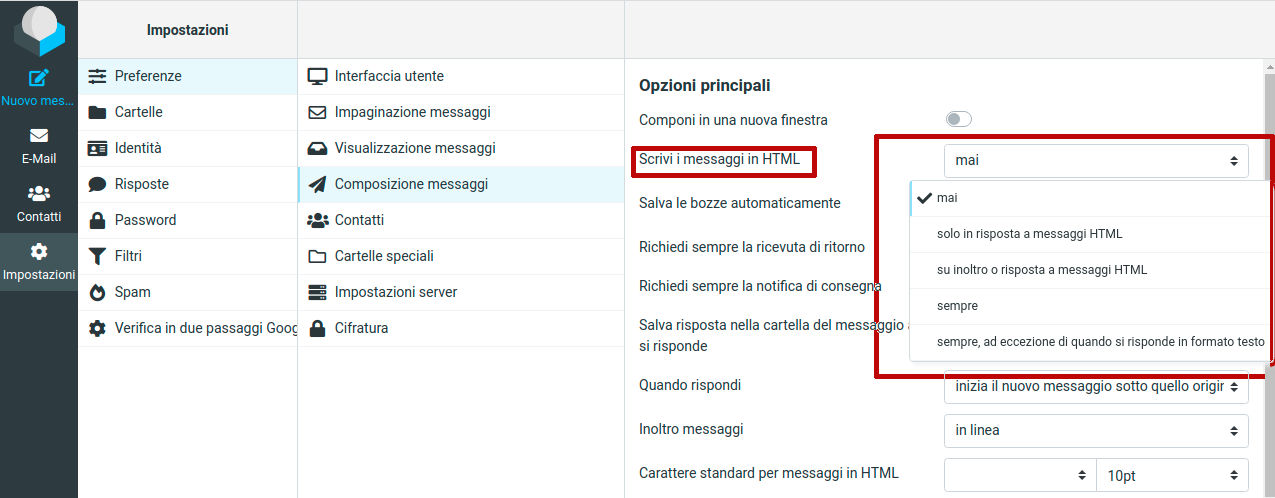
From now on, the webmail will always show the HTML editor when writing the message.
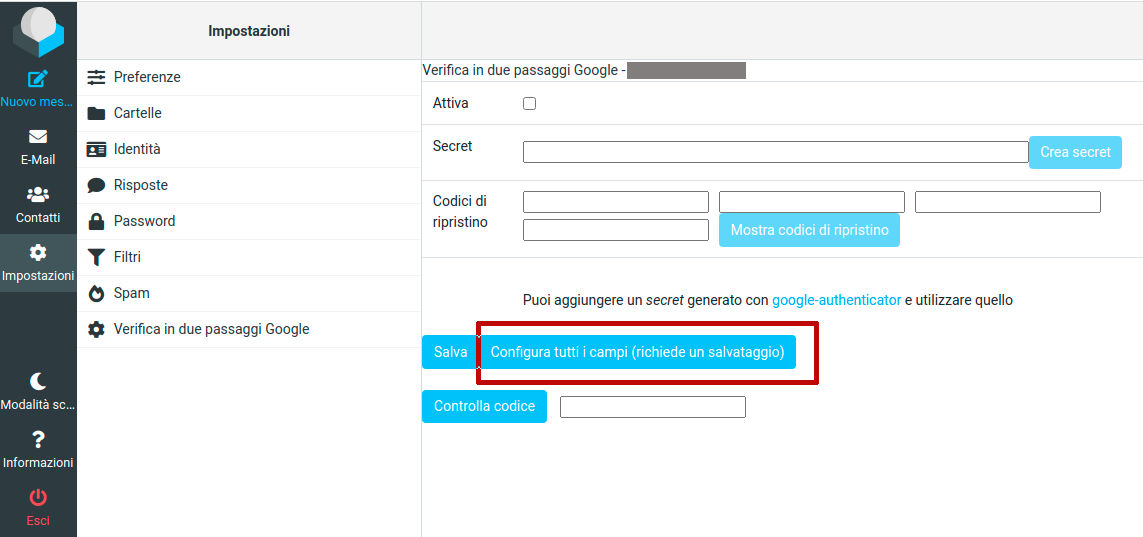
Activate 2-factor authentication with Google Authenticator
To activate 2-factor authentication with Google Authenticator, you must install the Google Authenticator app on your smartphone, which is available free of charge from the Google Play store.
Once installed, connect to the webmail and perform the following actions:
- Go to the account settings (Impostazioni button on the main bar);
- Click on the Verifica in due passaggi Google (Google Two-Step Verification) entry in the Settings column;
- Click on the Configura tutti i campi (Configure all fields) button in the area displayed;
- This will automatically populate all the fields available and display a QRCode;
- Safely store the four recovery codes on the form;
- Open the Google Authenticator app, scan the QRCodewith the app and click on Aggiungi Account (Add Account);
- Lastly, enter the code shown by the app in the last field at the bottom of the webmail form and click on the Controlla Codice (Check Code) button;
- Click the Save button to make the setting active.
IMPORTANT From now on, you will only be able to log in to the webmail using the 2-factor authentication procedure.
After logging in, the new authentication procedure will then show a further step with a single text field in which to enter the control code generated by the Google Authenticator app.
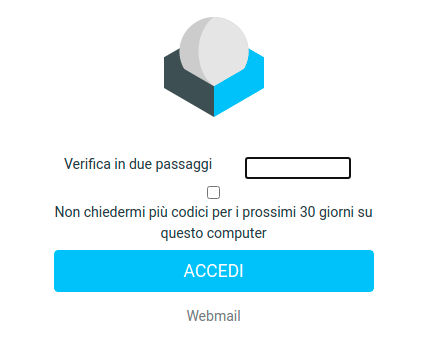
Once the control code has been entered correctly, click on the ACCEDI (enter) button to access the webmail