
New services, add-ons and upgrades
How to purchase new services or upgrades from the ServerMate control panel
Once logged in to the ServerMate control panel, it is possible to work independently on services to:
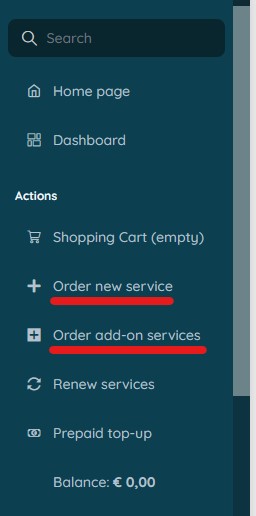
Add a new service
Click on Order new service in the menu on the left, in the Actions section:
This leads to the ‘Order New Service’ page:
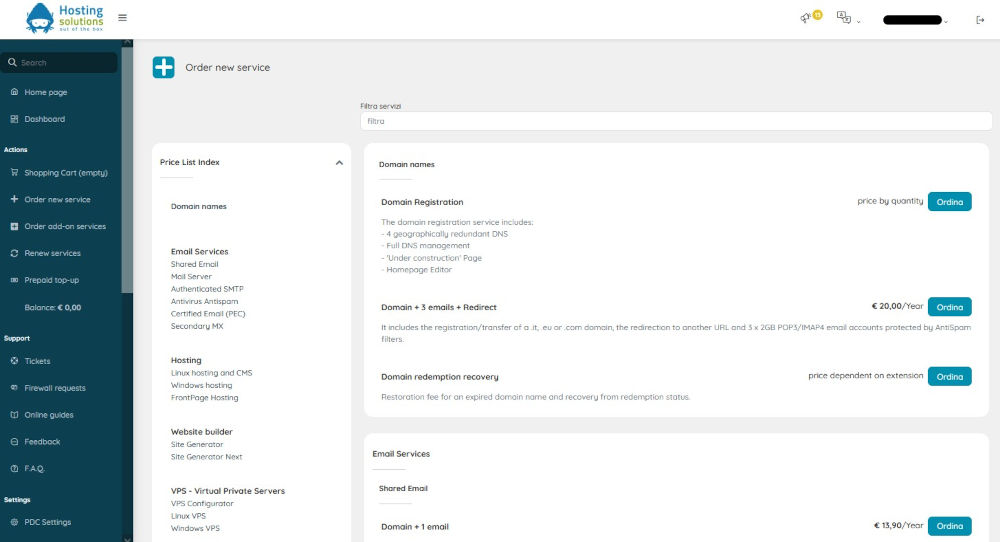
From the list of all the services divided by category (Domain names, Email services, Hosting plans, Website Builders, VPS etc.) click on the category or sub-category of interest. The list of services included in the selected category will be shown to the right of the list: once you have found the desired service, click on the corresponding Order button and follow the guided purchasing procedure.
Order Additional Services
To order an additional service, click on Order add-on services in the menu on the left-hand side, in the Actions section: the panel will offer the user a list that shows only additional services for services that are currently active.
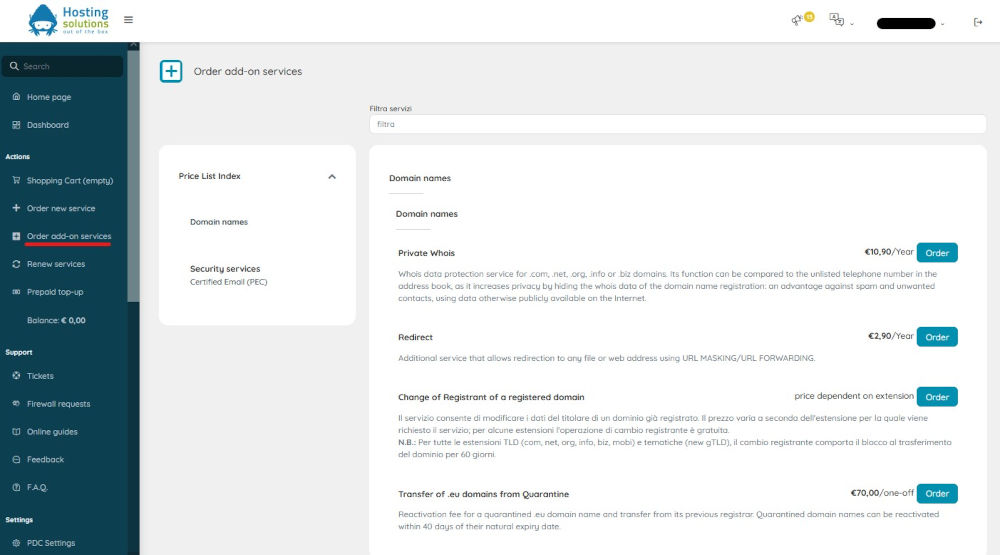
For example, let us suppose that a customer has the "Host Pointer" service among its active services (see image above): by clicking on Order Add-On Services, the panel will propose a list of additional services of the ‘Host Pointer’ service.
Once you have identified the service you require, click on the corresponding Order button and follow the instructions.
Upgrade of one or more active services
Upgrading a service enables the automatic transformation of an active service into another, of the same type but of a higher level, with costs based on the difference between the service fees, plus a possible activation cost (only in the case of Hard Upgrade). Not all services can be upgraded: to find out whether your service is among these, simply connect to the control panel and check the features associated with the service.
The home page of the control panel shows all active services divided into tabs by type of service (Domain names, Hosting & Dedicated, Cloud, etc). Click on the tab containing the service you wish to upgrade: in the list of active services shown, click on the down arrow next to the "Manage" button on the line of the service of interest.

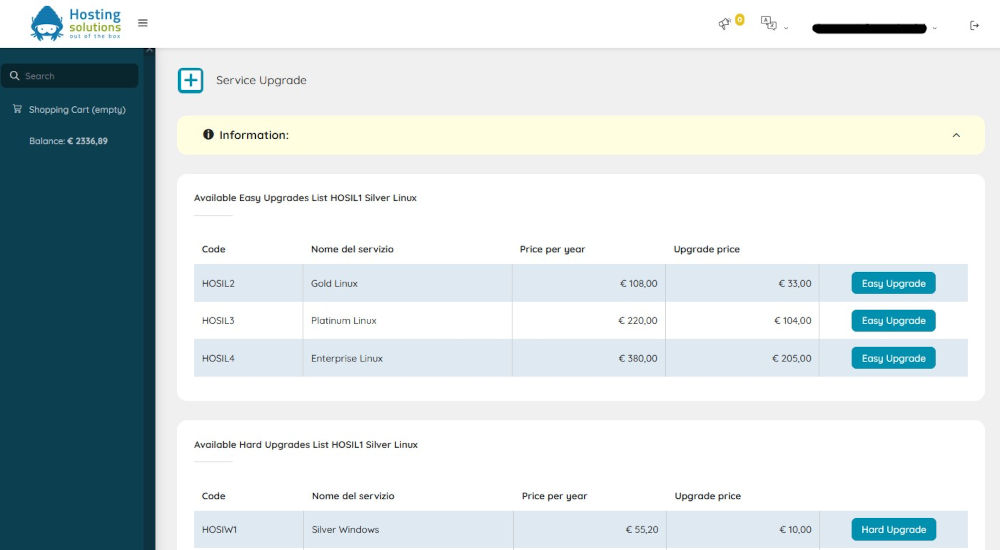
This will show a drop-down menu, click on Service Upgrade: the list of all possible upgrades will be shown, if available and the type, whether it is Easy or Hard Upgrade (an example in the next image).
Finally, click on the button corresponding to the desired upgrade and complete the procedure.
To give an example with a frequent case, let us imagine that we want to upgrade a Silver Linux hosting plan. In this case there are two possibilities:
- Easy Upgrade: this is the case when switching from Silver Linux to Gold Linux. Since it is a simple administrative activity and an increase in available resources, the fee to be paid is the difference between the new and the old fee. In the example, the switch from Silver Linux to Gold Linux (or, in general, to a hosting plan superior to Silver Linux) has a cost that is the equivalent of the difference between the fees.
- Hard Upgrade: an upgrade that involves reactivation of the service on a new server is considered Hard Upgrade. This is the case, for example, of the switch from Silver Linux to Silver Windows (NB: the physical transfer of the website files is the responsibility of the customer) as this upgrade involves moving the hosting plan from a Linux server to a Windows server and the reactivation of the service on the new server. The cost of this upgrade is higher than that of an Easy Upgrade, in fact it is the difference between the two fees + activation cost (one-off).