
Cloud Computing - Managing persistent volumes
How to manage persistent volumes on Windows and Linux instances
What is a persistent volume
This is disk space separate from that included in the instance. However, the space can be attached to any instance and can be passed from one instance to another. If the instance, to which the persistent volume belongs, is deleted, the persistent volume is not deleted and can be attached to other instances.
IMPORTANT: Connection and disconnection operations to instances must be performed on active instances.
Below you can see:
- Create and attach volume for Windows instance
- Initialise and format volume as Windows disk
- Volume disconnection from instance and panel
- Manage persistent volumes for Linux instances
- Link multiple volumes to a Linux instance
- Change the status of a Linux/Windows instance with associated volume(s)
Create and attach volume for Windows instance
Go to the Cloud Computing section of the ServerMate control panel and click on the Crea Volume icon.

A window will open in which you must specify the name of the volume and its size, as shown below.
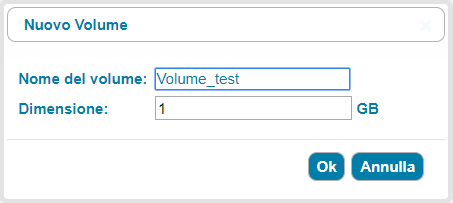
The OK button starts the procedure to create the volume, which will then be visible in the Volumi Aggiuntivi section.
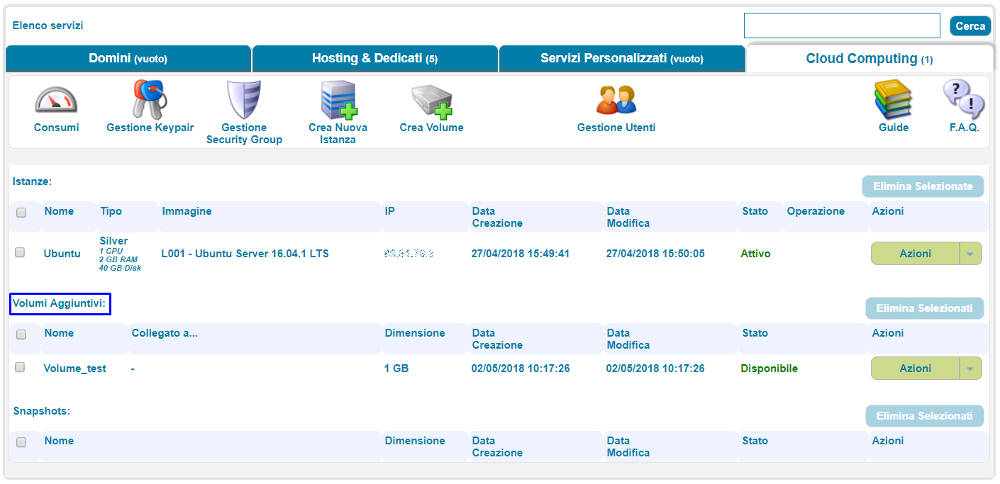
After creating the volume, you can attach it to a cloud instance.
Click on the Azioni
button (next to the volume you just created) and choose Collega. A drop-down menu will appear from which you must select the instance to which you wish to attach the volume (in this case, the Windows Server instance has been selected).
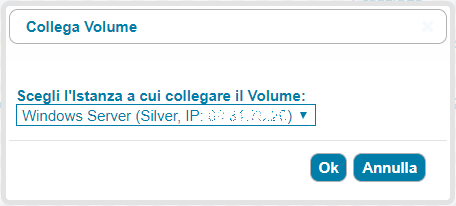
The OK button starts the procedure to attach the volume. When the operation is complete, the status of the volume will change to In Uso and the interface will show the name of the instance to which it has been connected.

To manage the newly connected disk, you need to access the cloud instance. Since it is a Windows operating system, you can access it via Remote Desktop or the VNC console integrated in the panel. In the latter case, click on the Azioni button next to the Windows instance and choose Console VNC.
The VNC console is compatible with Chrome, Firefox, Edge browsers and Internet Explorer versions after 8. You can open the console in a new browser window for easier interaction by clicking the Apri in un'altra finestra.
Initialise and format volume as Windows disk
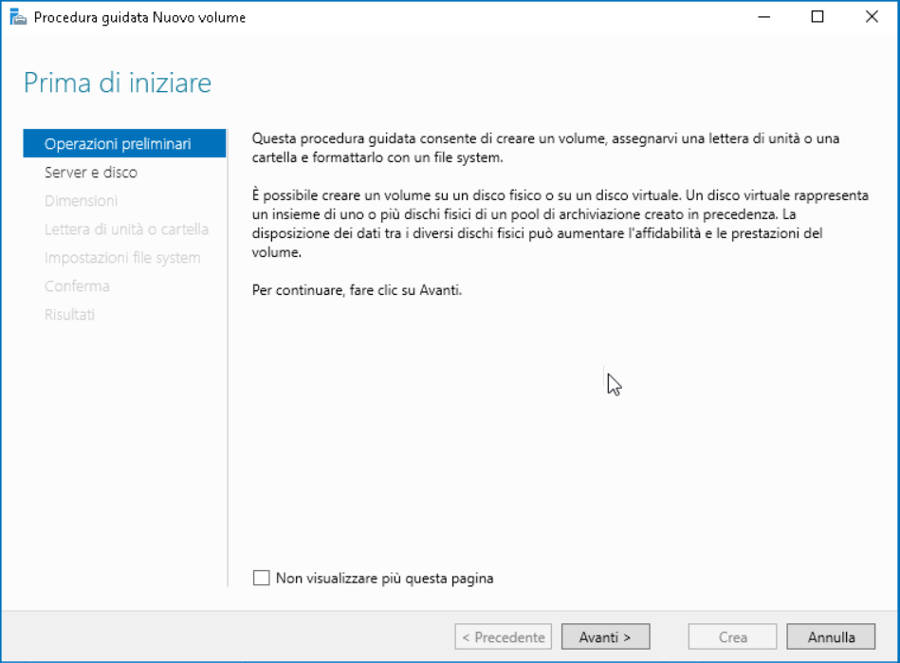
The first time a volume is created, it must be initialised and formatted so that it is correctly recognised by the Windows operating system. Here are the steps to complete this procedure.
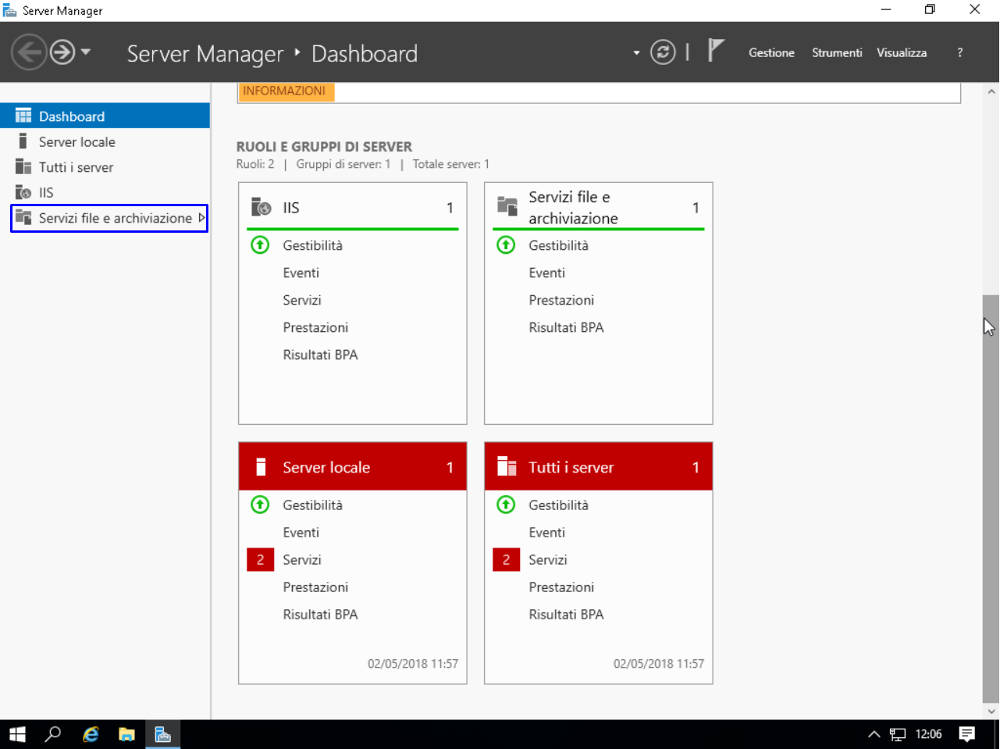
Launch the Server Manager and click on File and Storage Services
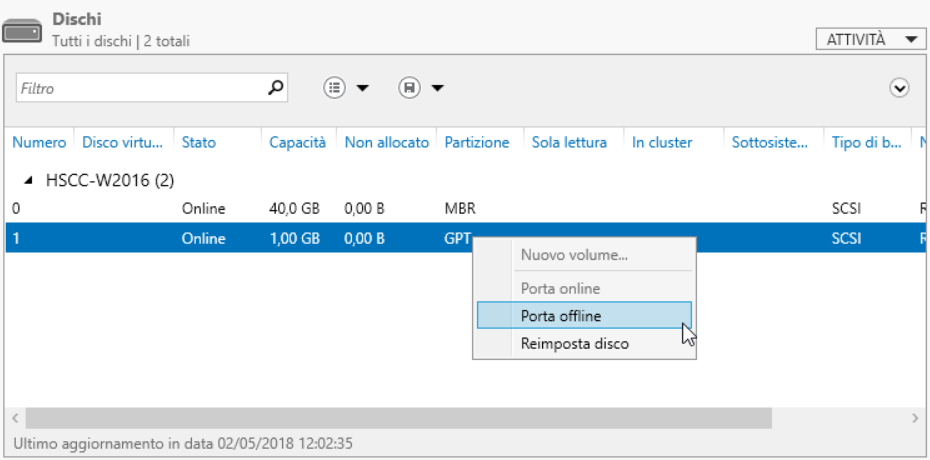
Now select Disk and locate the previously associated volume (it will be listed as Offline). Right-click on the volume and select Bring online
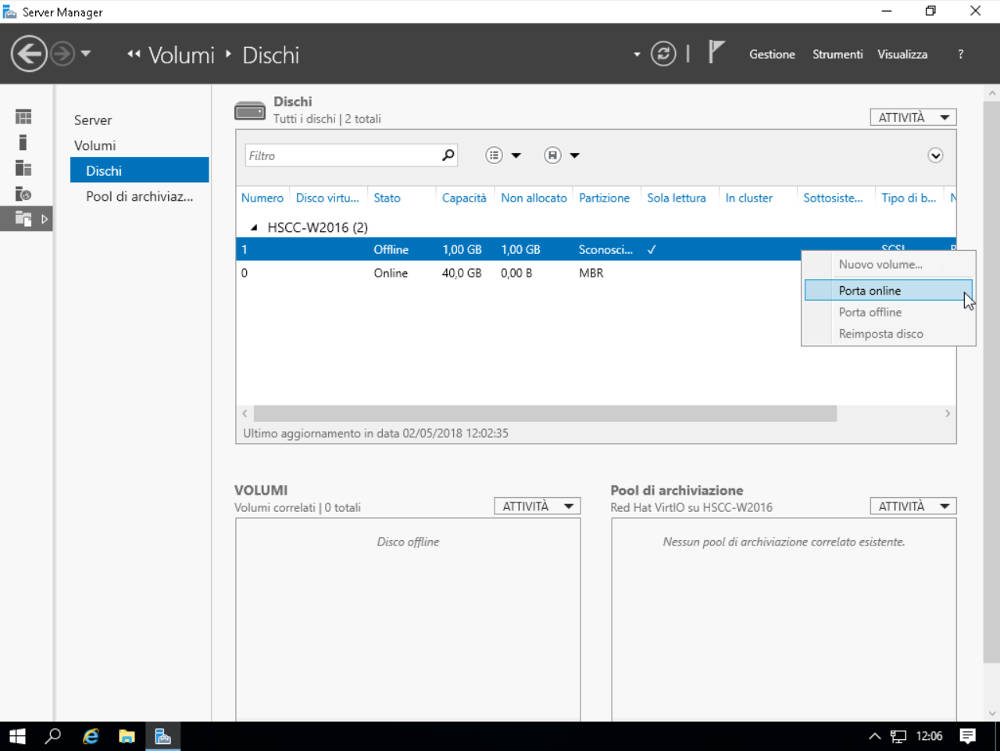
Confirm and wait a few moments. Right-click again on the volume and select New volume, the following screen appears.
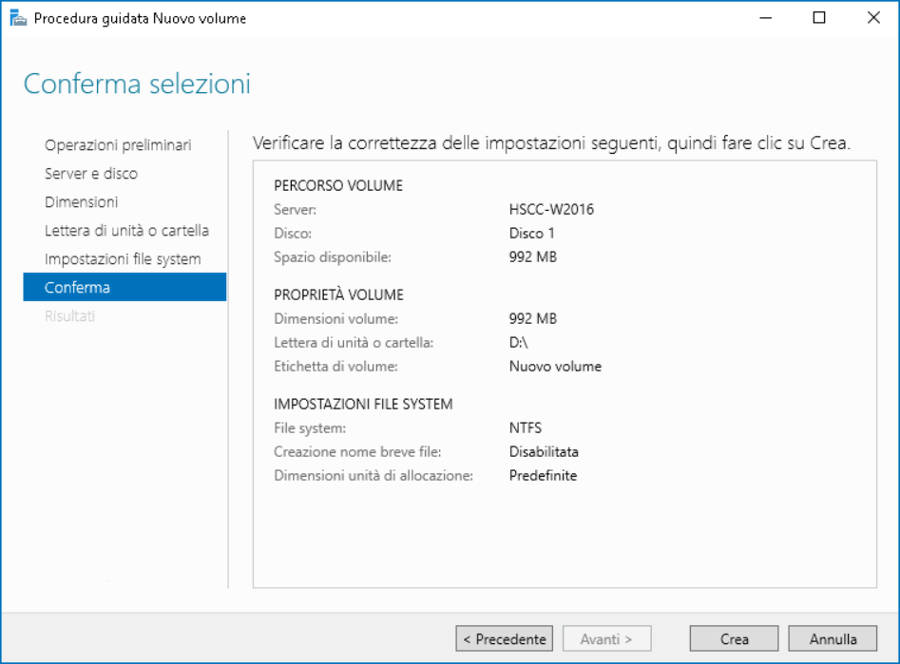
The final step of the wizard shows all the information about the volume. Click on the Create button and wait a few moments.
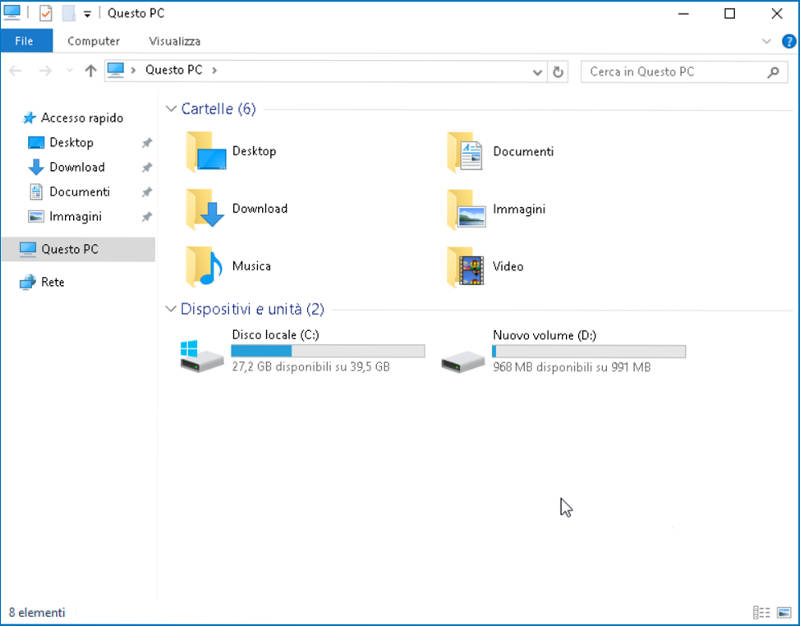
Now click on the This PC icon on your desktop to display and access the volume you have just created.
Volume disconnection from instance and panel
If you wish to disconnect the volume from the instance, you must follow the steps in the sequence shown below.
[passo 1: Disable] Go to the DisK section (File and Storage Services) of the Server Manager, right-click on the volume and select offline port.
[passo 2: Disconnect] The volume is now no longer associated with the operating system and can be disconnected.
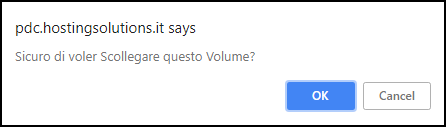
Next, access the ServerMate control panel and the Cloud Computing section. Click on the Azioni button next to the volume and select Scollega.
IMPORTANT: Do not disconnect the volume before disabling it (offline mode) from the operating system of the associated instance.

The message "Are you sure you want to Disconnect this Volume?" will appear at the top of the screen. Click on Ok to confirm and complete the procedure.
After refreshing the panel page, the volume status will return to Disponibile and no more instances will appear under the heading Collegato a.
Manage persistent volumes for Linux instances
In the case of Linux-type instances, volume management differs in the stages of creating partitions and the file system for the volume itself.
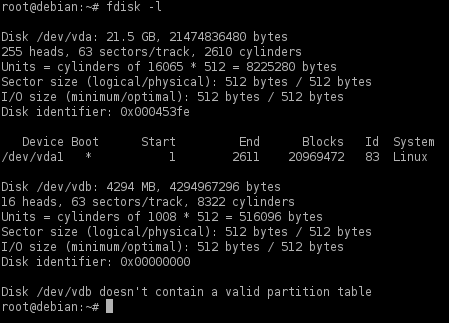
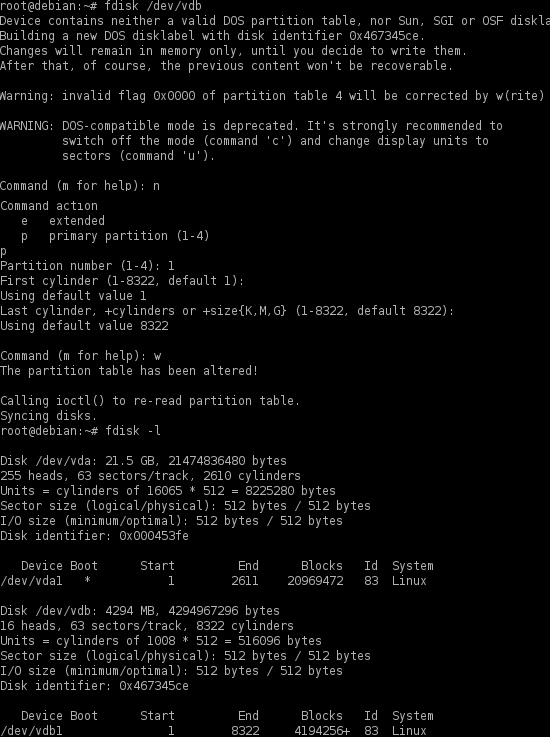
Suppose you have created a 4GB volume and connected it to an instance; in this case, since it is a Linux instance, enter the machine's shell and switch to the root user. Launch the following command:
fdisk -l
which gives a list of devices seen by the instance; note the one next to the volume you just created (e.g. /dev/vdb). As you can see, the volume you just created does not have a valid partition table.
Run, for example, the command:
fdisk /dev/vdb
and the following key sequence on your keyboard (for default values) :
n, enter,
p, enter
1, enter, enter, enter,
w, enter
This will create a partition table with a single partition the size of the whole disk, as can be seen by running the command again:
fdisk -l
ou can now format the disk with a file system of your choice. For example, to create an ext4 file system, run the command
mkfs.ext4 /dev/vdb1
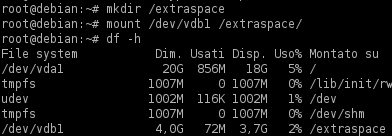
If you use other Linux images that do not have the script, you can of course mount the volume manually, with no need to disconnect and reconnect the disk. To do so, type the following commands:
mkdir /extraspace
mount /dev/vdb1 /extraspace
Then verify that the operation was successful, type the command:
df -h
The volume you have just mounted should, in fact, appear in the list printed by the command, as in the following image.
If you want to mount the volume manually even with Linux distributions that have the automount script, you need to disable it by opening the /etc/ebsmount.conf file and setting ENABLED=False
PLEASE NOTE It is recommended to umount the volume(e.g. umount /dev/vdb1) before disconnecting it.
Link Multiple Volumes to a Linux Instance
Multiple volumes can be linked to a single instance, but not vice versa. For Linux instances, the device management system assigns the volume to the first available device path. So if the instance has only the root disk identified with /dev/vda, the first volume added will be identified as /dev/vdb, as you can see from the above screenshots. Any other connected volumes will get a subsequent device path (e.g. /dev/vdc,/dev/vdd, etc.)
Change the status of a Linux/Windows instance with associated volume(s)
In order to change the status of an instance (active, suspended, etc.) and maintain a correct association between the instance itself and one or more volumes associated with it, proceed as follows.
If you need to stop the instance and start it again later, you need to stop it from the Cloud ServerMate control panel, using the Suspend and Start buttons and not from within the instance.
On restarting, the instance and associated volumes will return to the status prior to shutdown (suspension style).
If you need to restart the instance, you can restart it either from inside the machine (start command to restart the system or, alternatively, the sudo reboot command) or from the cloud panel using the Riavvia action. In the latter case, Windows instances may show a message such as "he computer has not been properly shut down", but the association with the volume will remain unchanged in any case.