
ServerMate control panel: the Transfer Services feature
How to change invoicing details in our control panel
You can change the invoicing details for one or more services, such as when you company name changes or when a reseller transfers services directly to an end customer.
To do this, use the Transfer Services feature to assign selected services to another customer account. Once the transfer process is completed correctly, the moved services will be invoiced to the new customer account.
PLEASE NOTE: the Transfer Services feature is different from the editing account page, which should be used to update contact information such as address, city, phone or fax number and email addresses.
The Transfer Services feature allows you to assign one or more services:
- to an existing customer account: the selected services will be removed from the current account and transferred to another active customer account;
- to a new customer account: you must first create a new account with the customer's details. Once created, it will be available to receive the selected services from the originating account.
How to move services
- Log in to the ServerMate Control Panel
- From the main menu, go to Control Panel tools and click Transfer Services.
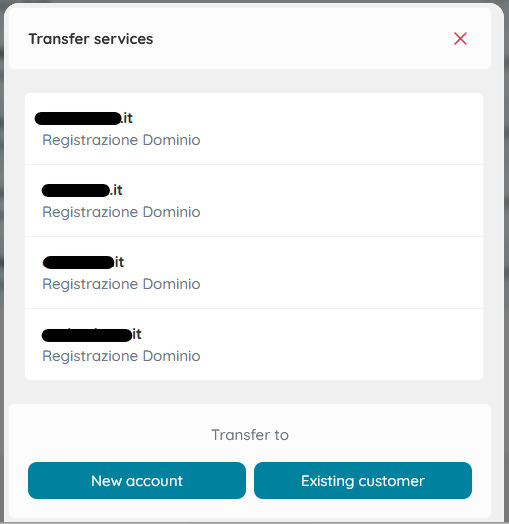
- In the Transfer Services page, you will see a list of services (active, expired or pending cancellations): select the services you want to move by ticking the relevant checkboxes, then click Transfer selected to start the process.
- In the summary window showing the selected services, choose "Existing account" (see Case A) if the recipient is already a Hosting Solutions customer, or "New account" (see Case B) if the recipient is not yet a customer.
- Case A: Transfer to an existing account
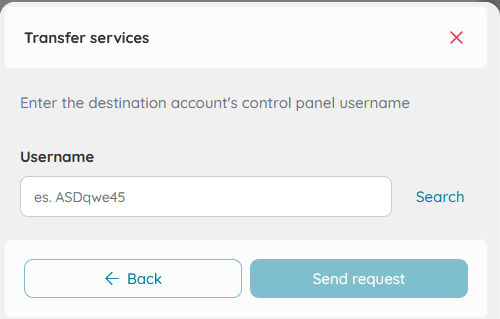
In the popup window, enter the recipient's client control panel username and click "Search". The system will verify whether the user exists; if found, the "Send request" button will be enabled. Click on it to initiate the transfer process.
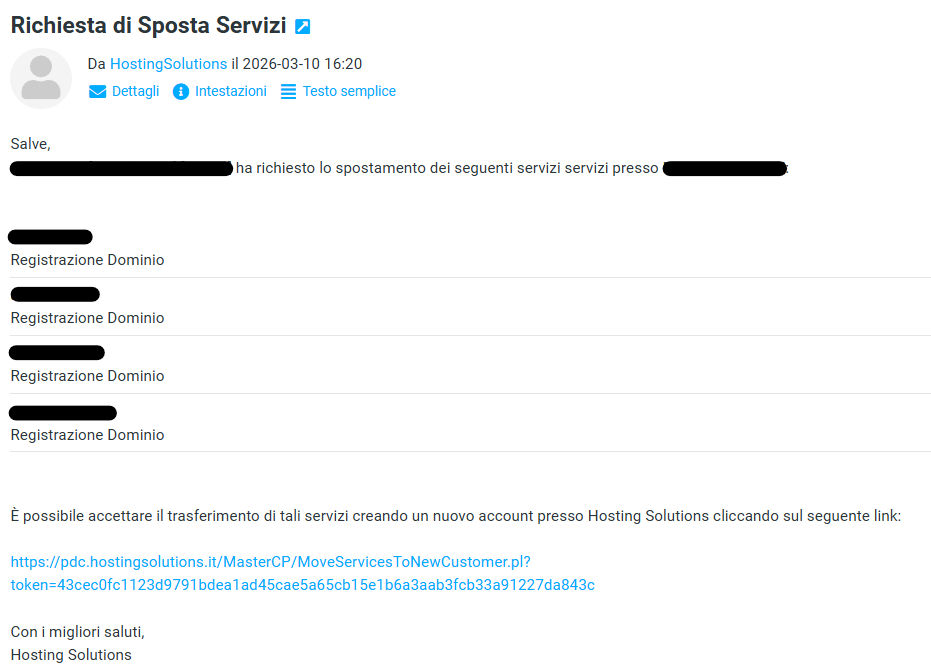
The recipient will receive an automated email similar to the example shown in the figure below:
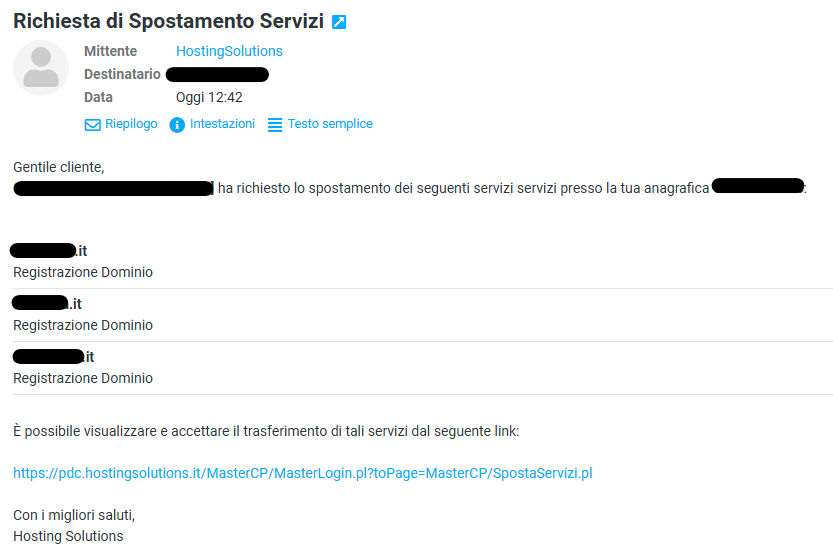
containing a link at the bottom of the message. By clicking this link, they will be directed to the control panel, where they can log in with the credentials and choose to accept or deny the service transfer request.
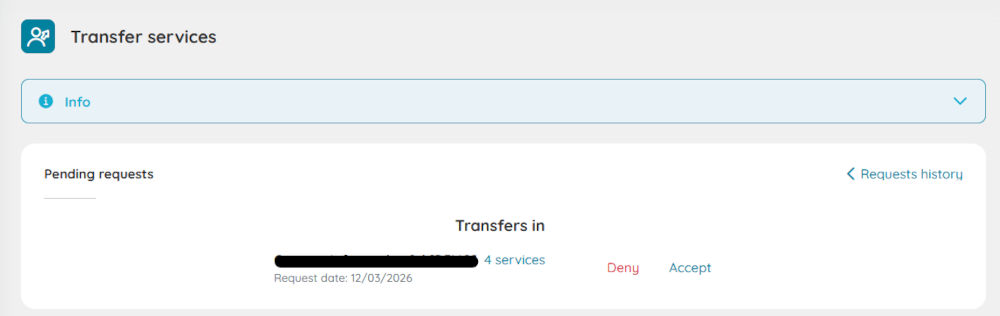
The customer who initiated the procedure will need to wait for the recipient’s response (Accept or Reject). Until a decision is made, the "Transfer Services" section will display the status information as shown in the figure below.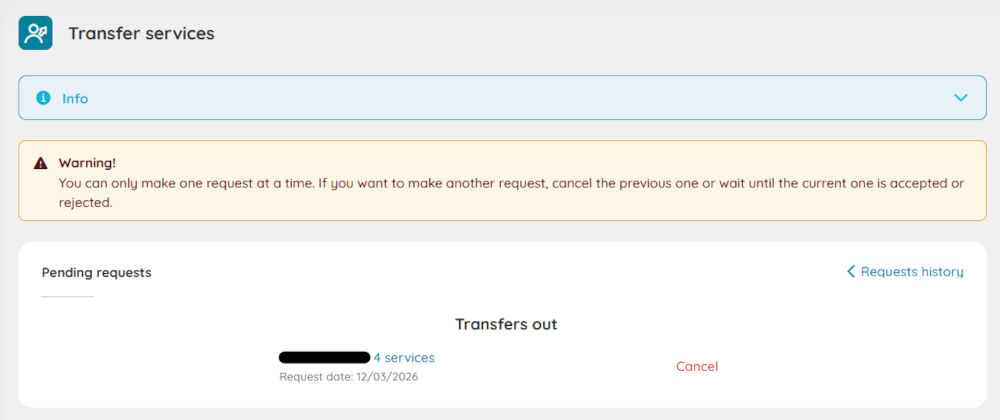
If the recipient accepts the service transfer, they can view or download the Service Transfer Acceptance Agreement document at any time from the "Document Downloads" section of the control panel. - Case B: Transfer to a New Account
In this case, you will need to register a new customer and create their account. The system will display a form where you must enter the required information, specifying whether the customer is a "Private person" or a "Company/Other".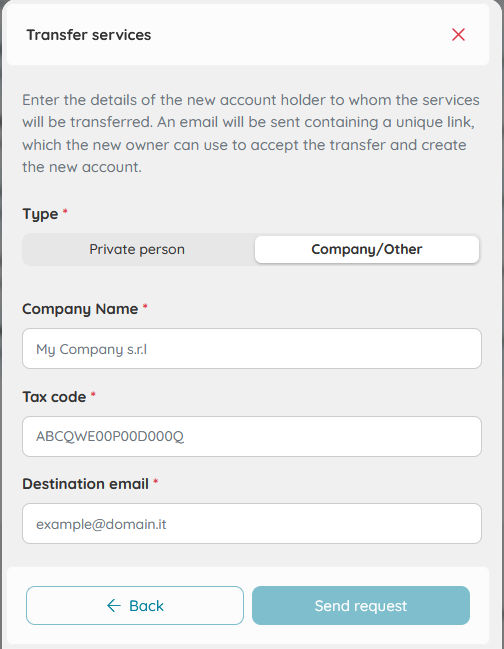
Once the details have been entered, click "Send request" to send the recipient an email containing a confirmation link. By following this link, the recipient will be directed to the control panel, where they can complete the registration process initiated by the original customer.
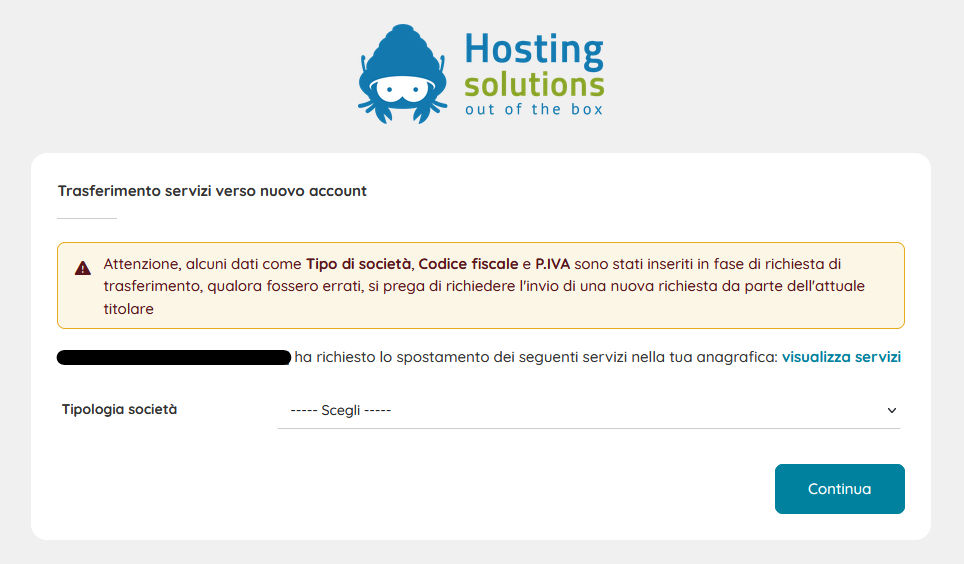
Follow the steps in the registration wizard. Once completed, the newly registered customer (recipient of the transferred services) will receive an email with their control panel login credentials. They must then log in and click "Transfer Services" in the left-hand menu to accept or reject the service transfer.
If the transfer is accepted, the Service Transfer Acceptance Agreement document will be available to view or download at any time from the "Document Downloads" section of the control panel.

IMPORTANT Once the recipient accepts the transfer request, the services will no longer be visible in the original account’s control panel and will only be available in the new account’s control panel.