
Host Pointer Control Panel
Control panel of a single Host Pointer for multidomain plans
On multi-domain hosting plans, both on Windows and Linux,platforms, it is possible to divide the space between the various hosting and websites by using the additional Host Pointer service. Through the Master control panel, it is possible to manage each individual pointer and configure: write permissions, FTP user, web properties, antivirus, antispam and more.
The Host Pointer service is suitable for resellers of the hosting service, as it allows you to manage the hosting service to be divided between the various customers, providing each of them with a user control panel.
From the Master control panel, in fact, it is possible to create access to a dedicated panel for each individual Host Pointer
active on each multi-domain hosting plan. In this way, if necessary, it is possible to make the customer independent both for the publication of the pages of the website and for the management of the resources dedicated to him (excluding the renewal of the service and technical assistance).
In addition, if you have joined the Private Label Reseller Programme, you will see your customisations in the Host Pointer panel.
Below are the instructions for activating access to the Host Pointer control panel.
- Access the resource management of the multi-domain plan
- Set a password to be issued to the customer
- Access the host pointer control panel
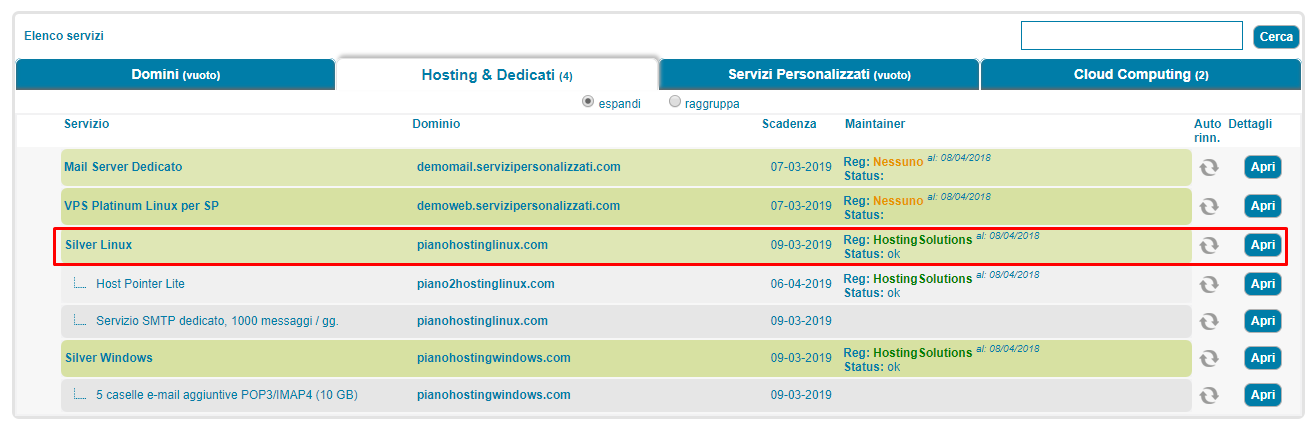
Once you have accessed the ServerMate control panel, click on the Apri button next to relevant multi-domain plan, as shown in the following figure:
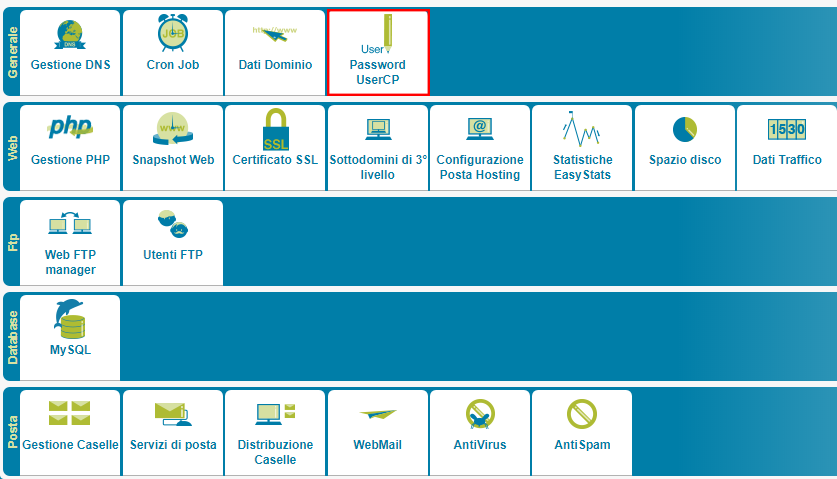
To set the password, click on UserCP Password
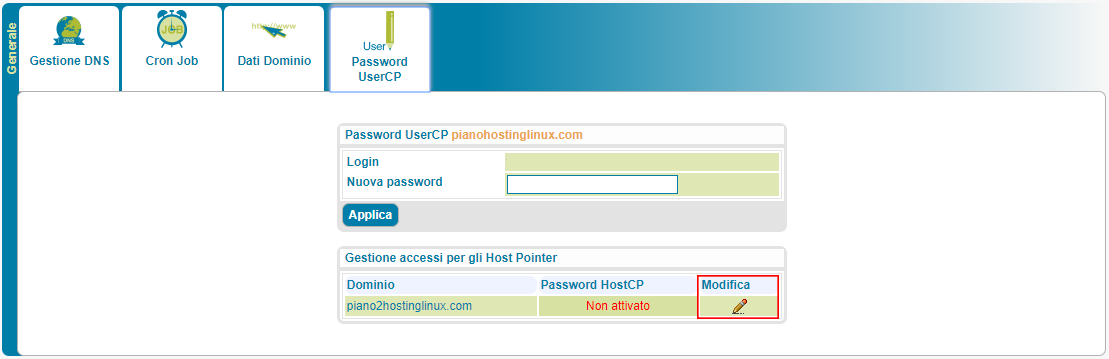
The list of all the Host Pointers active on the plan will then be displayed. To activate access to the Host Pointer control panel, simply click on the pencil next to the pointer on the right, as shown in the figure.
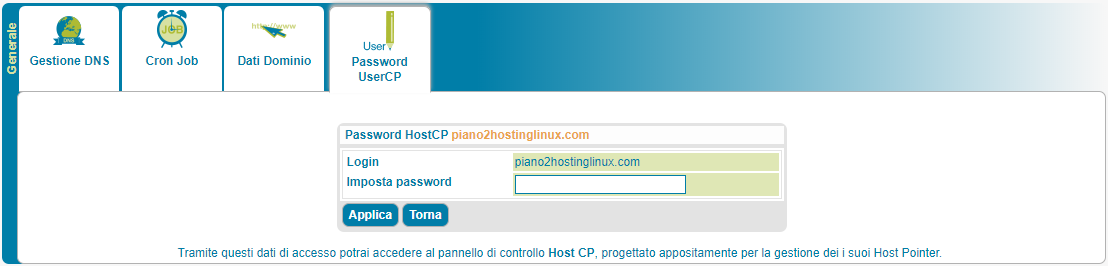
Enter your password and click on the Apply button to complete the procedure.
To access the Host Pointer control panel connect to the following address: https://pdc.hostingsolutions.it/hostcp/
The login credentials are the name of the domain to be managed and the password set in the previous step.
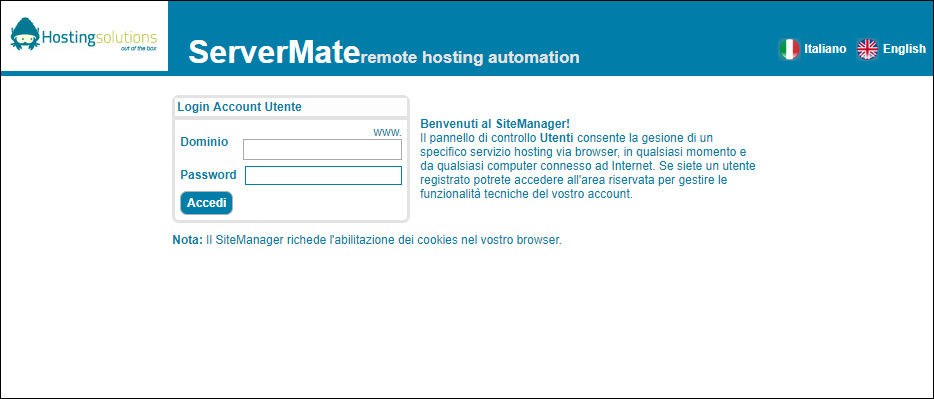
Customised Login Page
If you need to create a customised login page to access the host pointer panel from a website or web application, you can use the following example html form:
	<table>
		<tr>
			<td colspan="2">
				Login Account Utente:
			</td>
		</tr>
		<tr>
			<td>
				<b>Dominio</b>
			</td>
			<td>
				www.<input name="domain" size=18 class=text>
			</td>
		</tr>
		<tr>
			<td>
				<b>Password</b>
			</td>
			<td>
				<input name="pass" size=18 class=text type=password>
			</td>
		</tr>
		<tr>
			<td colspan="2">
				<input name="log" type=submit class=buttons value=Accedi>
			</td>
		</tr>
	</table>