
How to configure an Android device for backup via S3 on Storage On Line
Create an access via S3 to the Smart Storage
Below is a guide for configuring, on an Android device, access to and use of online storage space (e.g. Smart Storage) using the S3 protocol.
In this example, we have used a free and widely used S3 client, available for Android, called S3Anywhere. Download and install the S3Anyware app from the relevant store.
How to create an S3 access to the Smart Storage
Before starting the S3Anyware application, we recommend creating a folder to act as an entry point for the S3 protocol (instead of the bucket), using one of the other available protocols, e.g. webFTP.
- log in to your control panel account
- click on the Apri (Open) button next to the Smart Storage service
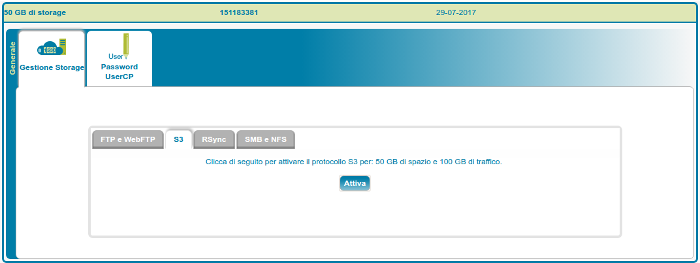
- select the Gestione Storage (Storage Management) tab
- select the S3 tab and activate the protocol by clicking on the Attiva (Activate) button
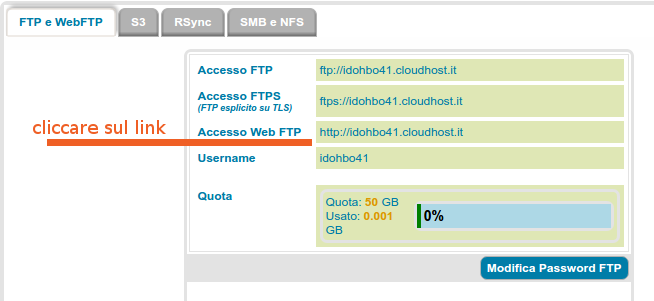
- select the FTP and WebFTP tab and click on the link next to Accesso Web FTP (FTP Web Access), which will open the nt2ftp web application
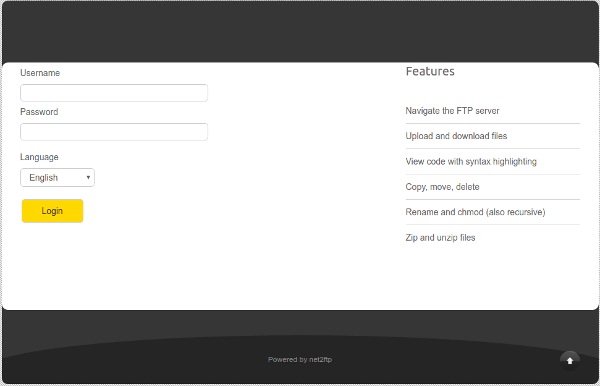
- access the net2ftp web application using the credentials received upon activation of the service:
- in the Username field, enter the content of the Access Key ID written in the activation email;
- in the Password field, enter the contents of the Secret Access Key written in the activation email.
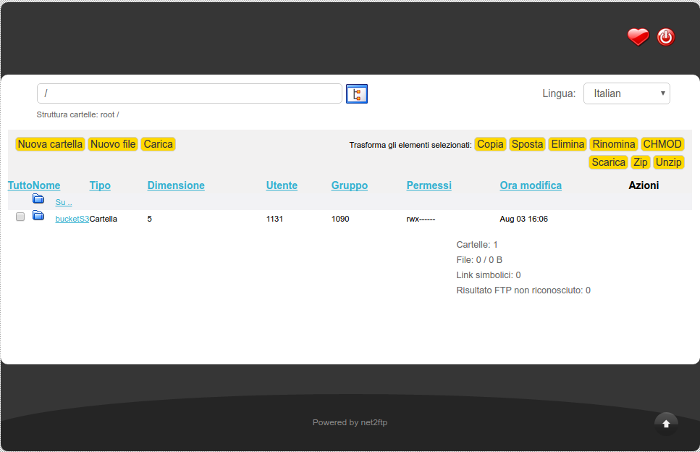
- in the net2ftp main screen, select the Nuova cartella (New Folder) button
- enter the name of the new folder, e.g. bucketS3: the new folder should then appear in the list of folders displayed later on the main screen.
- disconnect from net2ftp
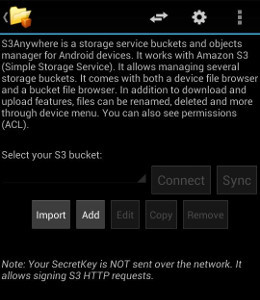
Now start the S3Anywhere app on your Android device.
- select the Add button, to add an S3 access point on the main screen of S3Anywhere
- enter the data for the connection:
- S3 URL: enter the access point communicated in the activation email, replacing "http" for "s3"; for example, if the S3 access point is s3://xxxxx.cloudhost.it, enter http://xxxxxxxx.cloudhost.it
- KeyID: in the activation email is the access key ID
- SecretKey: in the activation email is Secret Access Key
- Bucket: is the folder just created with net2ftp (webFTP), in our example bucketS3
- Local dir: optional, it is the default local folder, on your Android device; use the browse button to select it
- Remote dir: optional, it is the default remote folder, on the storage server; use the browse button to select it

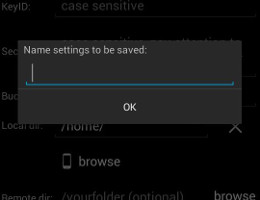
- press the Save button to save the entered settings of the new S3 access point
- enter a name for the newly created connection in the Name settings to be saved window
Going back to the main screen, it is possible to see the S3 connection just created in the box below the text Select your S3 bucket. For our example, the name is HS-SmartStorage.

How to transfer files from local media to Smart Storage using S3 (upload)
Let's take a look at some methods for transferring files with S3 from the Android device to your Smart Storage.
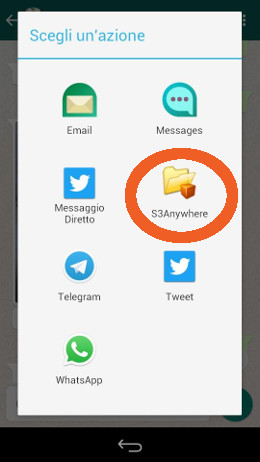
The first method is very simple and allows you to transfer contents directly from the apps that display them (e.g. photos, documents, etc.). In fact, the apps on the Android device (e.g. Gallery, WhatsApp, Telegram, etc.) generally allow you to share contents; we can verify that, once our Smart Storage has been configured through S3Anyware, when sharing contents, these apps make the S3 connection available among the various possible sharing destinations. It will be enough, therefore, to select, for example, the photo (or other type of file) from one of the apps and select the sharing or saving option: the app, among the various options, will also provide the S3 folder(see image).
The second method, on the other hand, allows you to transfer the chosen files directly from the folders of the Android device. All you have to do is open the S3Anyware app, press the Connect button next to the S3 connection of interest (in the case of our example, HS-SmartStorage) and, once in the main screen, select the mobile phone icon in the top right-hand corner (see image) to display the contents of the Android device.
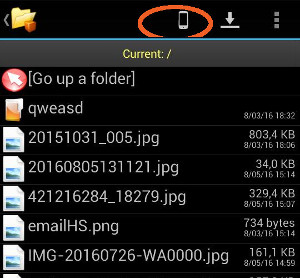
This will open the navigation through the folders and files in the Android device, from which you can choose the files to be transferred and select them.
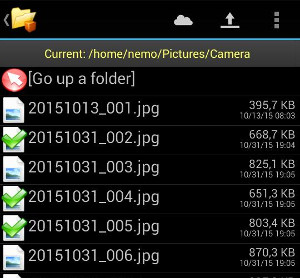
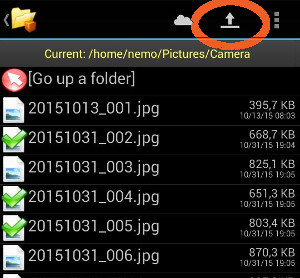
Once the files have been selected (a green tick appears on each file), click on the up-arrow icon (at the top right of the screen, see image) to make the transfer (upload).
Once the transfer is complete, the files are also available on the Smart Storage.