Guides
Discover the guides to use our services

Acronis Backup - Agent installation
From Acronis Backup control panel for Physical VM, workstation or server
The backup operations are performed in the Backup & Disaster Recovery section of the Acronis Client control panel.
To manage the devices associated with your Acronis account, you first need to install a software (agent) on the devices. Here are the steps to complete the agent installation.
- Access the Acronis control panel (https://cloud.acronis.com). The procedure is described in detail in the following guide: Acronis Backup: how to access the control panel.
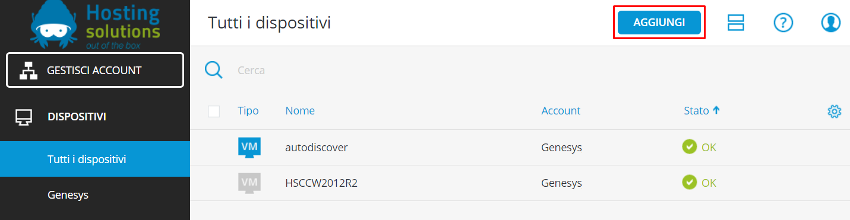
- Locate and click the add button on the Devices screen, the first one to be loaded by default:
- In the Add devices window you can choose the operating system for which you purchased the Acronis Backup service and download the appropriate version of the agent; in the example we will download the agent for Windows workstations (32- or 64-bit version).
NOTE For Linux workstations, select the Linux agent for servers.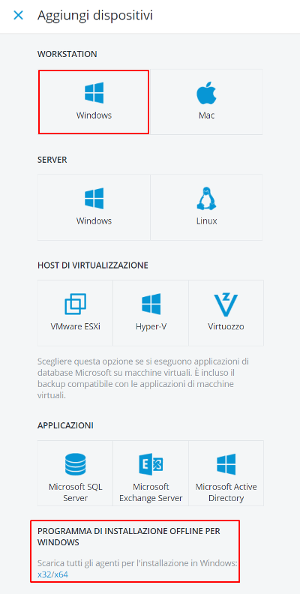 Then save the file on the local computer, on the physical server or on the Virtual Machine, start the installation procedure ( Install button) and enter the user name and password of the Client account to which you wish to associate the device
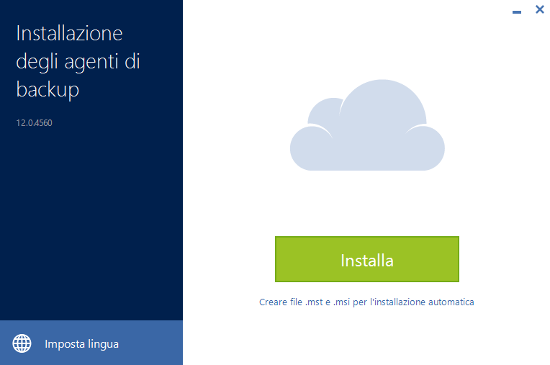
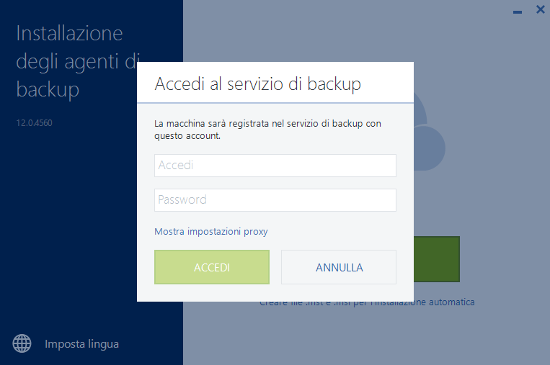
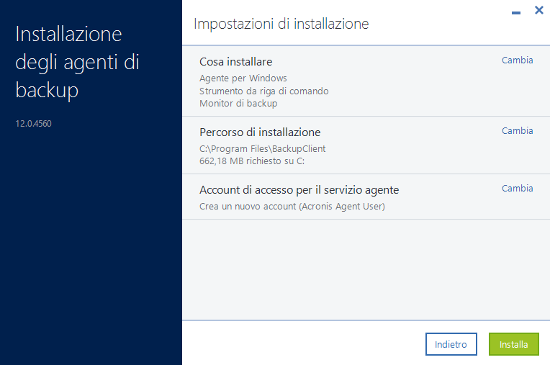
- If the login procedure is successful, the agent installation will start. In case you are using the offline installation file, you can customize the procedure by selecting the components to be installed, the installation location and any new Acronis account to be associated with the device:
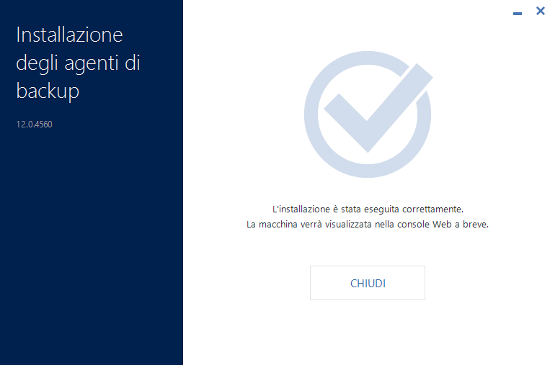
- The following screen will be displayed after installation:
 The operating system will show a pop-up notification of the newly installed agent at the bottom right and started automatically:
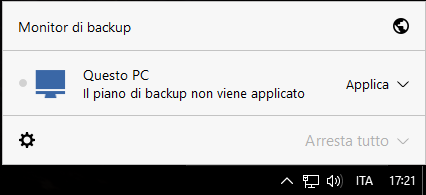 The Apply button allows you to use the default backup plan on the current device or create a custom backup plan. The gear icon (bottom left) allows you to launch the backup console from your browser, view agent information (version etc.) or stop the agent from running.