
Cloud Computing - Security Groups Management
Management of customized firewall rules grouped under the same name
IMPORTANT The assignment of an additional security group to an instance must be carried out when the instance is created. Afterwards, when the instance has already been created, it will no longer be possible to perform the procedure.
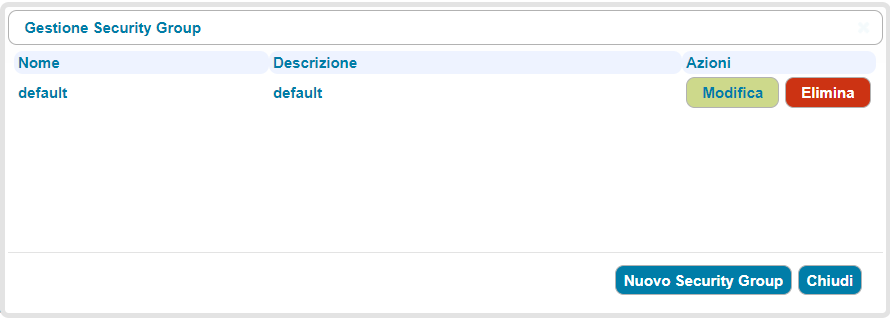
A security group is a set of customised firewall rules grouped under one name; there is a default security group that includes rules to allow pinging of the instance's public IP address and ssh access via port 22.
he user can add the preferred rules to the default security group at any time; the new rules are applied to each instance created with that security group.
It is also possible to create a new security group and associate it with an instance, but only when creating the latter.
An additional security group can be useful, for example, when you want to create sets of rules for specific purposes and assign them to certain instances. For example, let’s imagine that we have a Linux instance with Webmin installed and a Windows instance with IIS; it is possible to create a WindowSec security group to open port 3389 for access in Terminal and port 80 for IIS; for the Linux instance, it is possible to create a LinuxSec security group and here add port 80 and 10000 (a specific Webmin port).
The creation of dedicated security groups is intended to avoid opening ports that would not be used by all instances (e.g. Linux does not use port 3389 assigned to IIS).
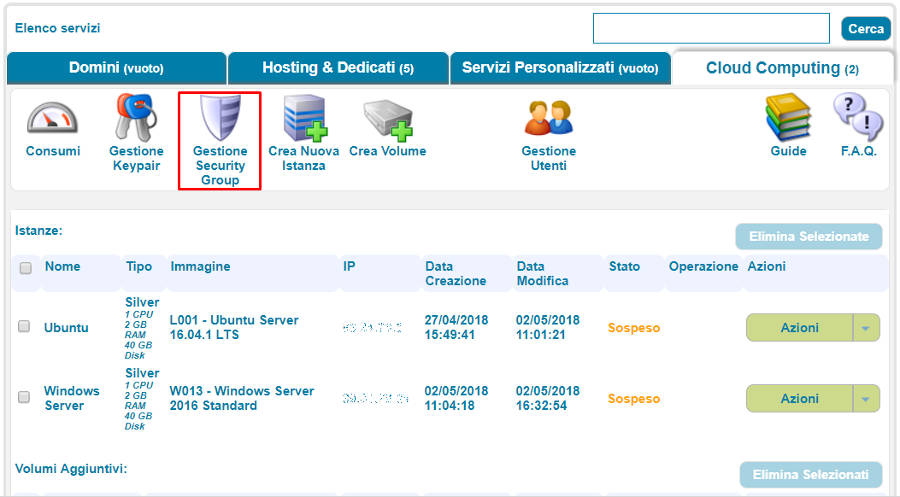
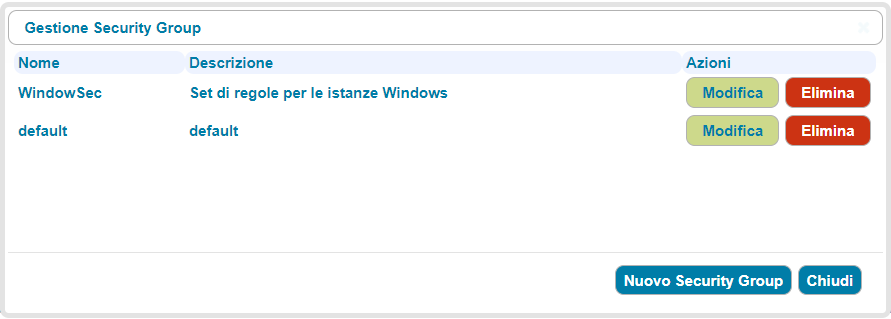
To manage the security groups, click on the Gestione Security Group icon in the Cloud Computing section of the ServerMate panel; the following window will open:
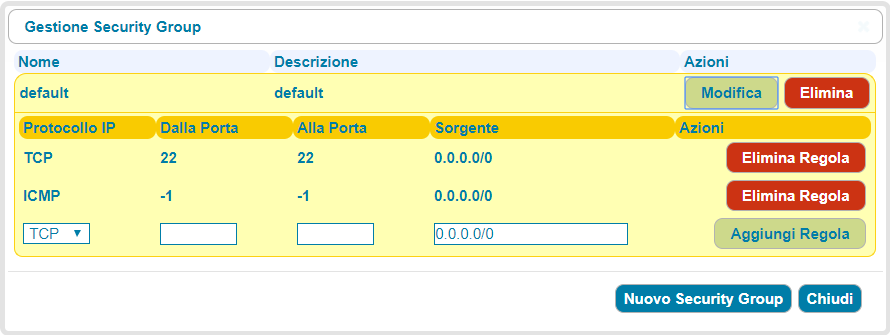
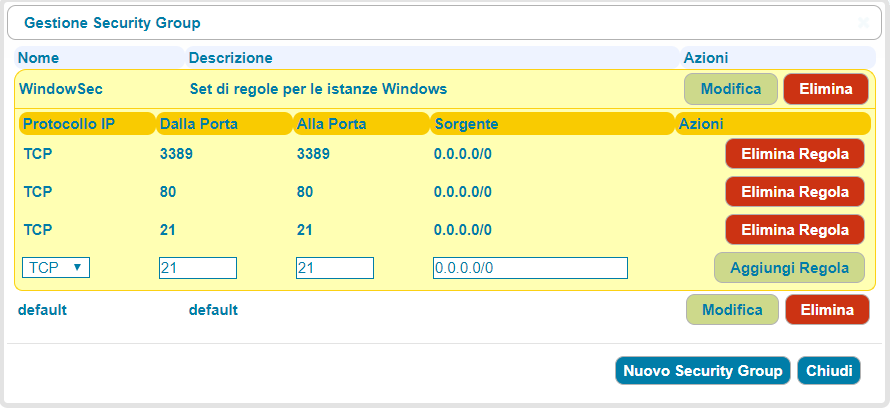
To view, add or remove firewall rules from the default security group, click on Modifica. The list of currently existing rules opens:
It is possible to delete the existing rules by clicking on the Elimina Regola o aggiungerne di nuove; in quest'ultimo caso, button or add new ones; in the latter case, you must specify the protocol (TCP, UDP or ICMP), the range of ports to be opened and the range of IP addresses that are subject to this rule (0.0.0/0 means that the rule applies to any IP address, according to CIDR notation); after entering all the data, click on Aggiungi Regola.
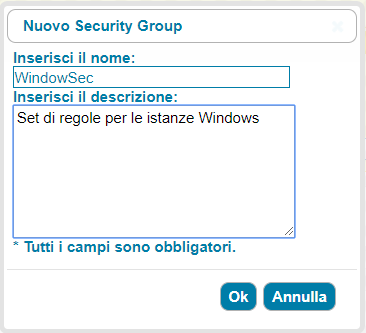
To create a new security group, click on the Nuovo Security Group button. On the next screen, specify the name and description of the security group you wish to create; for example:
Click on the Ok, button, the security group is created and appears in the main window of the security groups management panel.
By clicking on the Modifica button next to the newly created security group, you will access the window shown above in which you can add and remove rules.
The following figure shows the addition of ports 3389 (terminal access), 80 (web server) and 21 (ftp).
The security groups are associated with the instance at the time of its creation; the addition of rules to the security groups, and therefore their application to the instances associated with the relative security groups, may take place at any time. Let us see, for example, how it is possible to create a Windows instance and associate it with the previously created security group, in addition to the default one.
As can be seen in the figure above, the security group WindowSec has been selected in addition to default; this will ensure that the rules of both security groups are applied to the newly created instance.