
Antivirus Antispam for Dedicated Mail Server - Quarantine, Whitelist and Blacklist
How to release emails from quarantine, insert domains or boxes in whitelist or blacklist
When subscribing to the Dedicated Mail Server Antivirus Antispam service, an activation email is sent (to the address indicated for service communications) containing the administrator credentials, with which you can access the Libra Esva Control Panel.
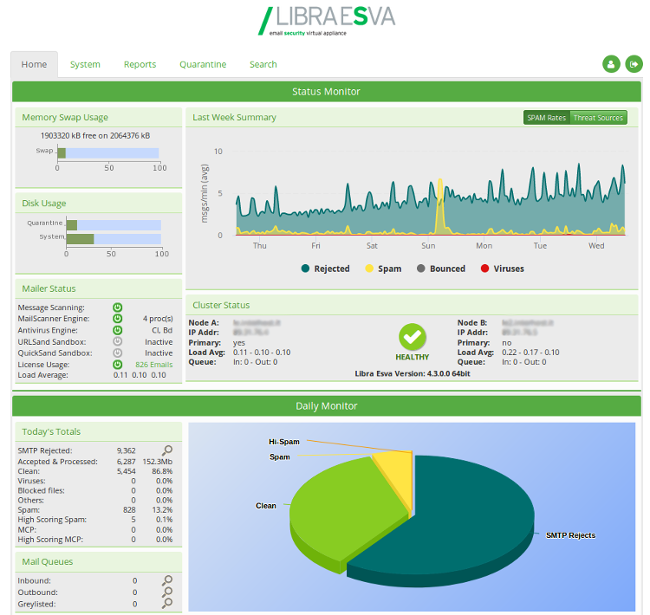
The main page of the panel (Home tab ) shows a set of aggregated data (daily and weekly) regarding messages checked by Libra Esva: data and graphs on blocked messages (due to Virus or SPAM) or clean messages.
The Quarantine tab contains all emails classified by Libra Esva (status) as SPAM, HISPAM, Virus or from blacklisted accounts or domains, in other words all emails considered by Libra Esva to be unclean.
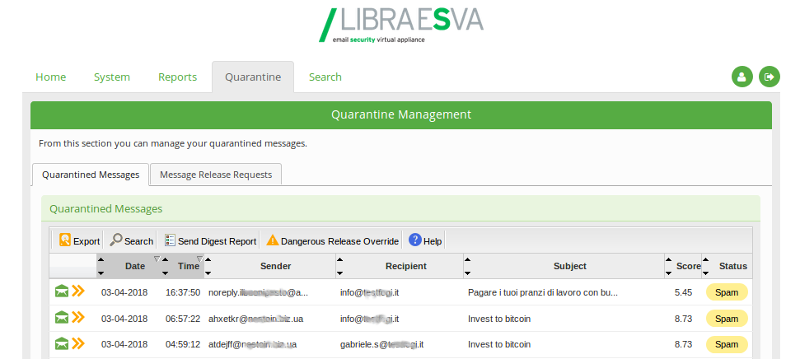
By clicking on the envelope icon on the left you will be able to see all information about the email, the cause of the block and the assigned SPAM score.
If you believe that an email in quarantine is not to be blocked, you can release it by clicking on the icon with two yellow arrows; it will then be forwarded to the recipient. Quarantined emails released to recipients will not be marked as SPAM emails, but will be considered as normal emails and therefore classified as Clean.
On the Systems tab, from the Content Analysis menu, it is possible to insert/delete email addresses or entire domains in Blacklist or WhiteList by selecting White & Black list.
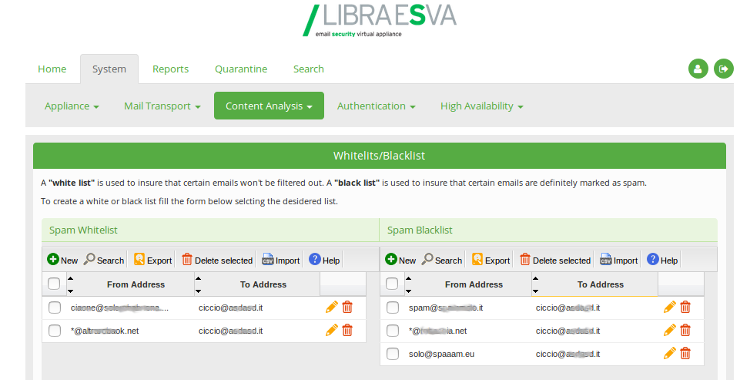
By clicking on the New button at the top left of both tables on the page (Spam Whitelist or Spam Blacklist), you can manually whitelist or blacklist a account or domain.
To add an item to a blacklist or whitelist, you must provide:
- In the From Address field, the email address or domain to be blacklisted or whitelisted;
- in the To Address field, the email addresses of the recipients for whom the rule is to be active. If it is necessary to set the white or black list rule for all the domains on the mail server, the "To Address" field must contain the default value (the string); otherwise, if the rule is only to be set for one domain, the "To Address" field must only contain the domain name concerned.
Once the black or white list rule has been created, it will be possible to modify it by clicking on the icon with the yellow pencil or delete it by clicking on the icon with the red trash, both present on the right of the row relative to the rule concerned. To delete several rules at the same time, simply select them by ticking the box to the left of each row and click on the Delete Selected button (red trash icon) at the top of the table.