
Cloud Computing: Linux Cloud instances with keypair
How to create Linux instances with keypair
The most secure way to access a Linux instance remotely is using an SSH connection with keypair authentication (key pairs, private and public https://it.wikipedia.org/wiki/Crittografia_asimmetrica)
It is important to remember that
- the key pair must be created before launching the instance
- the keypair cannot be associated later.
Therefore, before launching a Linux instance it is recommended to create a key pair, unless you wish to use a previously created one; this can be done from the Cloud Computing section of the ServerMate panel, by clicking on Manage Keypair.
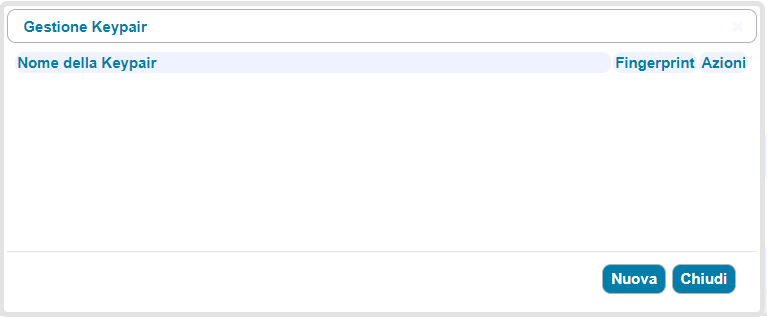
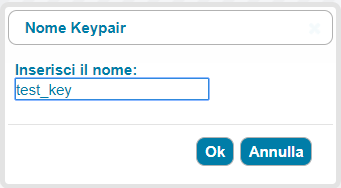
Click on New to create a new key pair; enter the name chosen for the key and press Ok, as in the following image.
The procedure will be completed in a few moments. Below is the popup window that shows the private key, which will also be sent to the email account in use (the email will have the subject Cloud Computing - Private Key Creation: key name and an attachment with a .pem extension to be saved on the local PC).
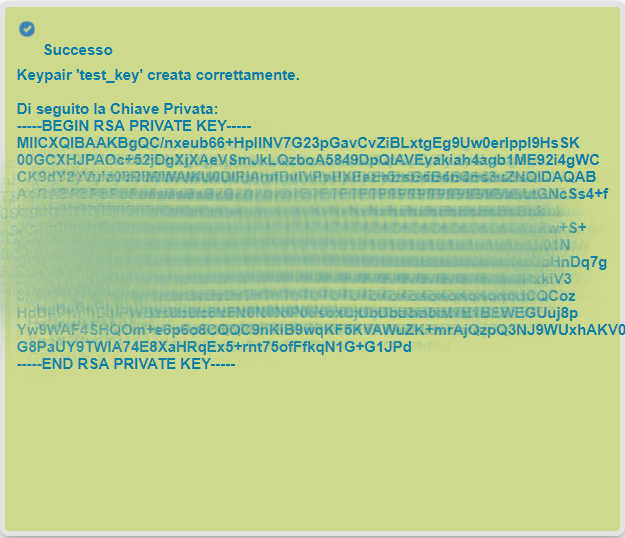
Alternatively, you can create a file containing the key from the popup shown; to do this, select and copy all the text contained between -----BEGIN RSA PRIVATE KEY------ and -----END RSA PRIVATE KEY----- nclusive, taking care not to copy or insert any additional spaces or characters. Paste the text into notepad or any other text editor and save it in a file with the extension .pem (example: test_key.pem).
The private key must not be shared and/or published, as it allows access to all instances that use it. The key pair created can be associated with all the instances created with the account in use.
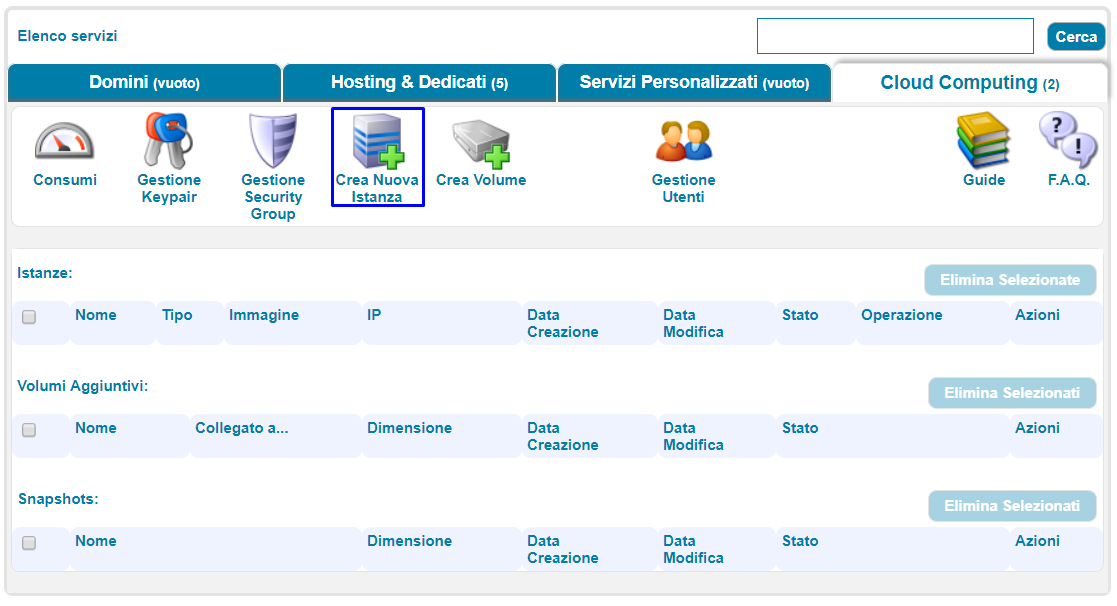
At this point, you need to create a cloud instance from a Linux image; click on the Crea Nuova Istanza icon.
Locate the preferred Linux distribution in the list and click on the Crea Istanza button; the window for entering the characteristics of the instance will then appear, as in the figure below.
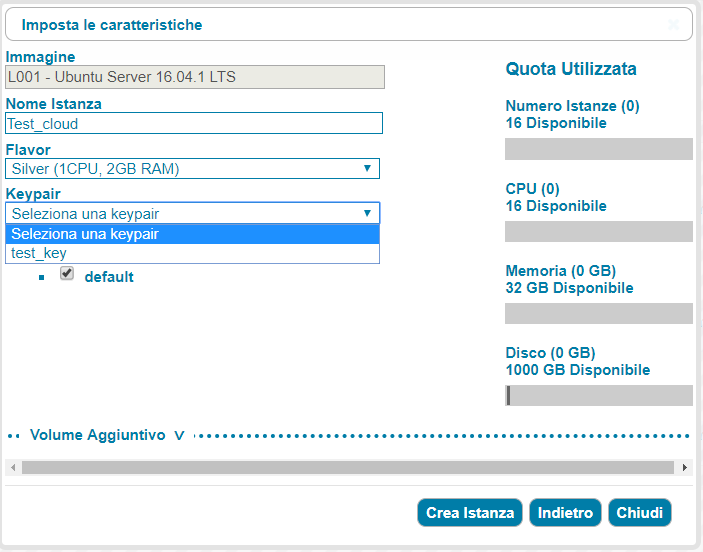
Enter the instance name, select the preferred flavor and the keypair created earlier. The Crea istanza button completes the wizard and starts the creation of the instance by the Hosting Solutions cloud computing platform.
The newly created instance will then be displayed in the Cloud Computing section of the ServerMate panel:

At this point, you can connect to the instance using the VNC console (click on the Azioni button) or, as in this case, using the key pair. The ways of connecting using the key pair vary depending on the operating system used on the computer from which you are connecting.
Windows operating system
Use the programmes Puttygen and Putty o import the private key and connect to the instance respectively. You can download both at the following address
https://www.chiark.greenend.org.uk/~sgtatham/putty/download.html
Run Puttygen and click on Conversions, Import Key
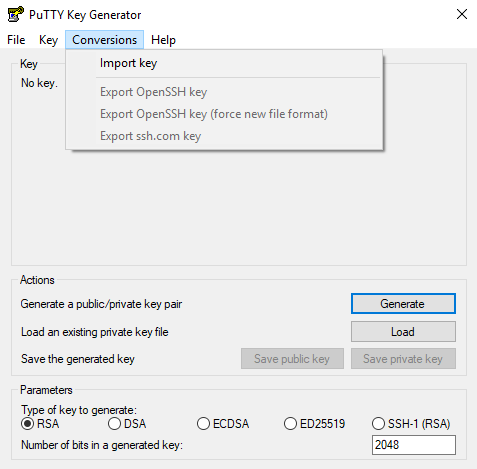
Search for the private key previously saved on the local PC (e.g.: test_key.pem) and import it by clicking on Open to display the following screen.
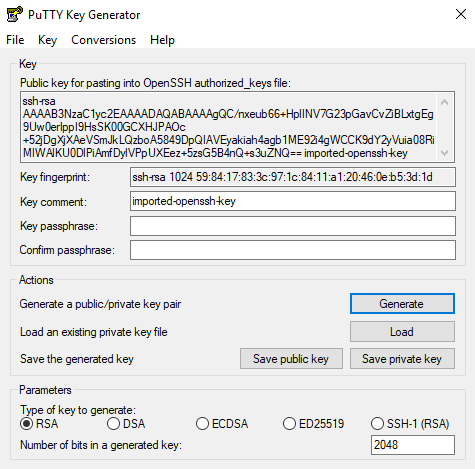
It is possible to enter either a comment (Key comment) or a password (passphrase) for the key. Now click on Save Private Key o save the private key on the local PC (file with the extension .ppk).
At this point start the Putty program, locate the Host Name (or IP Address) box and enter the IP address shown in the Cloud Computing section of the panel, next to the instance previously activated (e.g. 89.31.XX.XXX).
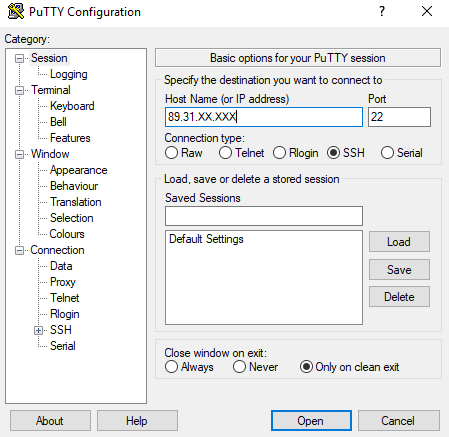
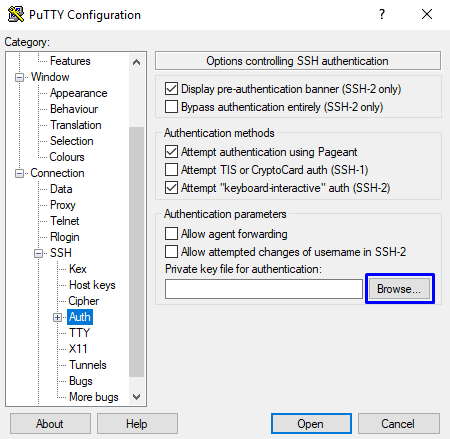
Now click on SSH (side menu), Auth and the Browse button. Browse your local PC and enter the private key you previously saved (file with the extension .ppk).
The Open button initiates the connection to the instance. Putty may display a warning message saying that it does not know the host with which it is trying to establish a connection. In any case, click on the Yes button to start the connection: you are simply connecting to the instance you have previously created.
At this point, once the user name has been specified (ubuntu for Ubuntu distributions, root for other distributions), the instance shell will open. Note that when using keypair, no password is required, as it is the association between the two keys that guarantees the security of the connection.
In this regard, we would again remind you never to disclose the private key as this would be equivalent to disclosing the access password.
Linux operating system
Open a shell and go to the folder in which the private key has been saved. For security reasons, change the key's permissions with the command
chmod 600 test_key.pem
Run the SSH connection command and pass the private key as a parameter with the command
ssh -i test_key.pem root@public-ip
Type Yes if you are asked to confirm the authenticity of the host.
After these operations, connection to the machine is complete.
For Ubuntu-type instances, the username to pass is ubuntu; therefore, in this case the command will be:
ssh -i test_key.pem ubuntu@public-ip