
Configure email accounts on the iPhone
How to configure our email service on an iPhone
The following guide describes the steps required to configure Hosting Solutions email accounts on iPhone smartphones.
iPhone Mail Configuration
E-mail accounts are set up using the iPhone Mail application. The functionality and steps are similar to those for a generic PC e-mail client.
Below are the steps to follow for configuration.
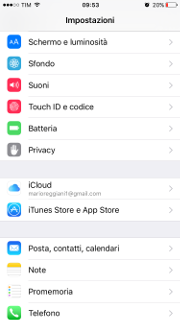
- From the Settings icon on the desktop, go to the Settings menu and select Mail, Contacts, Calendars.
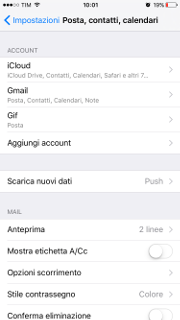
- Select the Add account item.
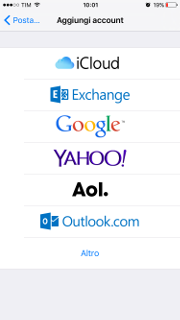
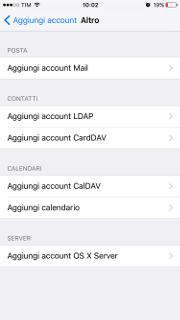
- From the list of possible account types (GMail, Yahoo!, etc.), select the item Other and then Add Email account

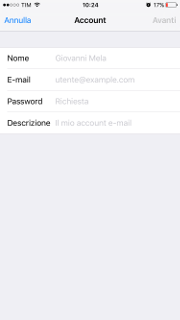
- In the New Account window, enter the required information.
- Select one of the desired POP/IMAP reception protocols and enter the required information in the relevant fields.
- In the outgoing mail server (SMTP) configuration section, enter the following information:
- By default, the iPhone Mail application will attempt to connect to the POP server using SSL. If it fails because the account you are trying to register does not use SSL, the following message will be displayed Unable to connect using SSL. Do you want to try setting up the account without SSL?. Answer Yes.
- Click on the Save button to complete the configuration procedure.

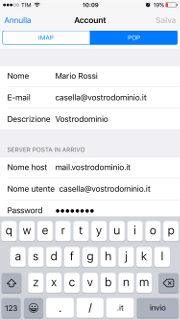
If the POP protocol is chosen, the following information must be provided in the Inbox Server section:
Host name: the name of the POP server (for Hosting Solutions it is of the type mail.domainname.extension);
Username: the e-mail address, of the type account@domainname.extension;
Password: the password of the account
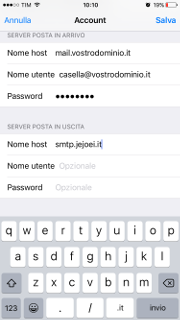
Host name: name of the SMTP server of your telephony or connectivity provider.
Username, Password: leave these fields blank unless you are using an authenticated SMTP service. In this case, the credentials are provided by the provider of the authenticated SMTP service.
PLEASE NOTE If you are using Hosting Solutions' dedicated authenticated SMTP service, enter smtpdom.interhost.it in the Host name field; the Username and Password are indicated in the SMTP service activation email.